Exercises for those over 60. Physical therapy for the elderly. Weekly training plan and basic training rules
Every Monday on AiF Health - new complex exercises for beauty and health. This week - 21 exercises for middle-aged and older people.
The goal of gymnastics is to adapt the body to everyday stress, regulate the functioning of the cardiovascular, autonomic, and neuromuscular systems, strengthen the musculoskeletal system, and create a good mood for middle-aged and older people.
All exercises must be performed with a smile and to the music.
Breathing exercise.
Starting position (i. p.) - standing, feet shoulder-width apart, arms freely lowered. Raise your arms up through your sides, inhale through your nose, lower your arms and exhale through your mouth. The diaphragm works, the shoulder blades move and move apart. We repeat the exercise 3 times. Every time we get up from a chair, we do this exercise again. We do it with a smile and without stress.
2. Shoulder rotation
I. p. - standing, legs slightly wider than shoulders, hands to shoulders. Rotational movements in the shoulder joint forward and backward. 4 turns forward, 4 back. Repeat 5-7 times.
Everyone regulates the volume and intensity of the exercise themselves. If you are under 62 years old, you can do more repetitions.
4. Warm up for the knee joints
I. p. — standing, legs wider than shoulders, slightly crouched, hands on knees, keeping your back straight.
We bring the knees together and separate them to the count of one-two-three-four. 3 reps. When we finished the exercise, we sat down on a chair.
6. Bend forward
I. p. - standing, feet slightly wider than shoulder-width apart, arms down. We do 2 springy inclinations for each leg. On the count of 1-4 we lean forward, then to one leg, on the count of 5-8 - forward, to the other leg. Straightened up, hands on the waist, slightly bent back. There is no need to tilt your head back.
When bending over, do not force yourself to reach the floor. The knees can be bent. Those who are able to do only 3-4 repetitions can stop there; those who can do more, do 6-7 repetitions.
7. Exercise “Swimming”
I. p. - standing, feet slightly wider than shoulder-width apart, arms down. “Swimming” with crawl. On the count from 1 to 4, the hands go forward, then back. The range of movements should be maximum. When the body is warmed up from previous exercises, this is easy to do. The upper one receives the load shoulder girdle.
9. "Boxing Match"
I. p. - standing, in hands - small or half-liter dumbbells plastic bottles with water.
We stand in a boxing stance, the body does not bend either forward or backward, feet shoulder-width apart, right arm extended forward, left bent and behind the right. The exercise is carried out with at different speeds. The first round is reconnaissance in force. On the count from 1 to 8, we throw one or the other hand forward, do 3 repetitions, the second round - a little faster, on the count from 1 to 8, three repetitions. And the final round is the shortest and most effective: we very quickly throw out our hands on a count of 1 to 7, the eighth blow with a swing is a knockout. We won, now we can rest a little.
10. Stretching
I. p. — sitting on a chair. We take a children's ball in the shape of a hedgehog, but you can do the exercise without it. (It is more difficult to perform the exercise with a ball.) Hold your hands with the ball, stretch them forward, turn your palms outward, and stretch until you crunch. Bend your arms at the elbows towards yourself, turn your hands inwards, straighten your arms at the elbows - hands outwards. Perform on a count from 1 to 8. Do 5-6 repetitions. After completing the exercise, twist the hands, closed into a lock, left and right.
Breathing exercise.
11. Exercise with an expander
(A rubber expander is sold at any pharmacy.) I. p. - standing, legs slightly wider than shoulders. We raise our arms up, stretch the expander, place it behind our head, release our hands - the expander is in front of our head. Perform on a count from 1 to 8. This exercise involves all the muscles of the upper shoulder girdle. The load is regulated by layers of rubber in the expander: the fewer layers, the less our effort.
12. Pulling your knees to your chest
I. p. — sitting on a chair. (This exercise is best done on an empty stomach.) Hands on your knees. Bend your right knee, pull it towards your chest, hold it with your hand for 2 seconds, lower your leg. We perform the exercise counting from 1 to 8. The same with the left knee. We do 8-12 repetitions. This exercise removes the stomach.
Breathing exercise.
14. Pulling and rotating the feet
I. p. - sitting. We take off our shoes. We stretch our legs and keep them hanging. We hold on to the back of the chair. We pull the toes of our feet towards ourselves, and pull them away from us. We don't put our feet down. We make an effort. We do 6-8 repetitions, and then circular rotations with your feet in and out.
Breathing exercise.
15. Lunges with rotation
I. p. - standing, leaning on the back of a chair. We take a step forward with our right foot, squat down, bend our knee, the left leg is extended back and rests on the floor. Then turn, change legs and arms, all the time leaning on the back of the chair. The second hand is on the belt. This helps keep your back straight. The torso is perpendicular to the floor, do not slouch, do not bend. One, two - turn, three-four - turn. Repeat 6-8 times.
16. Chair push-ups
I. p. - standing, facing the back of the chair. We bend and unbend our arms in elbow joint under the weight own body. The back and legs are on the same straight line. We rest our toes on the floor. When young people do push-ups, they should be lifting 80% of their weight. This is difficult for older people. They lift 18-20 kg from a chair.
This exercise must be performed carefully and briefly. Some may have had a fracture in the past, others may have weak arms.
We count from 1 to 8. We make one pass.
17. Self-massage
I. p. - sitting, legs slightly apart, hands on knees. Using your fingertips, applying little force, massage the back of your head in a circular motion. We rise higher - to the parietal region. Then we massage the forehead above the eyebrows - from the center to the temples. We go down a little lower - to the brow ridges. We stroke the face from the nose to the temples. Gently rub the temples in a circular motion. Massage your nose with two or three fingers. We go from the wings to the bridge of the nose. Then massage your cheeks and chin in a circular motion. And now - light pats under the chin. And we begin the foot massage. The most important thing is that we ourselves regulate what efforts we will make.
We massage the calf muscles from bottom to top with both hands, rise higher, slightly raise the thigh and massage the muscles back surface hips. Also the other leg. Then we lightly hit the muscles with the edge of the palm. We do everything with a smile.
18. Bend to the knee
I. p. — sitting on a chair. Cross your legs so that the ankle of one leg is pressed against the knee of the other, holding your leg with your hands. Slowly bend over and hold this position for several seconds. We change legs. We repeat the bends 2 times. Now we are working the muscles of the back and pelvis. You may feel tension in your lower back.
Breathing exercise.
20. Walking on straight legs
I. p. — standing, legs slightly wider than shoulders. Hands behind your back, elbows bent, hands on your waist. We rise on our tiptoes and move one leg slightly to the side. This is how penguins walk at the South Pole. We perform the exercise on a count from 1 to 8. We do 6-8 repetitions.
21. Relaxation
In conclusion, adopt a position that allows you to completely relax. I. p. - sitting on a chair. Legs are extended, arms hang relaxed, head tilted forward, sit like this for 30-40 seconds, listen to music and relax.
Note: Charging takes approximately half an hour. If you are under 65 years old, you can do it longer - up to 40-45 minutes. For people over 70, I do not recommend doing it for more than half an hour. After 75 years, it is enough to exercise for 25 minutes. After charging, it’s good to take a contrast shower.
Our information
Pavel Grigorievich Smolyansky- trainer athletics, worked with the Russian national track and field team and national team Republic of Guatemala. In Russia, his students became champions of the Russian Federation 11 times in middle and middle distance running. long distances, won the European Cup three times among sports clubs. In Guatemala, 23 national records were set.
Pavel Grigorievich created his own set of exercises for middle-aged and older people. Every Saturday from 11 to 12 noon he conducts adaptive gymnastics at the All-Russian Exhibition Center in pavilion No. 5.
Scientists have proven that regular classes sports, proper nutrition lead to excellent health and attractive appearance. A special program has been developed therapeutic gymnastics for women after 60 years, with regular implementation of which you can improve your health and maintain it at the proper level. The benefits of gymnastic exercises are as follows:
- Increased endurance.
- Improving physical qualities.
- A surge of vigor.
- The spine and joints are significantly strengthened.
- Metabolism is normalized.
- Development of flexibility.
In adulthood, intense physical activity can cause harm rather than benefit. That is why you need to pay attention not to the quantity of exercises performed, but to their quality. It is very important to perform gymnastics correctly so that the body really benefits from the actions performed.
Execution Rules
Correct and regular exercise at the age of 50-60 years will not only make you feel great, but also slow down the aging process. Before starting classes, it is recommended that you familiarize yourself with some rules:
- There should be a pause of at least 10 seconds between exercises. After intense exercise, they should be a minute.
- Actions are performed smoothly and not abruptly, otherwise you can cause harm to your joints.
- If gymnastics morning, it is recommended to perform it after getting a good night's sleep. Lack of sleep and exercise will lead to fatigue and weakness.
- Jumping and running at this age should be replaced by fast walking.
- Every month you need to learn a new exercise.
- You should not hold your breath during exercise. This will lead to oxygen starvation. It needs to be monitored very carefully.
- After performing gymnastics, you must rest. There should be a bottle of water nearby, because you may feel thirsty after exercise and this is completely normal.
Experts recommend performing movements slowly and smoothly at this age, otherwise ligaments can be damaged. Don't charge too quickly. To make your classes enjoyable, you can turn on your favorite music. The main thing is not to overwork on the first day. Exercises should be done with joy. Then the benefits from them will increase.
Set of exercises
Exercises for joint mobility:
- You need to place your feet shoulder-width apart and place your hands on your hips. It is necessary to rotate your head ten times in each direction.
- The original position is maintained. You need to perform several circular movements with your body.
- You need to stand up straight, place your feet at a width that does not cause difficulties. Perform 5 forward bends.
Exercises to strengthen your legs:
- You need to stand straight, put your feet shoulder-width apart. Squats are performed, and you need to make sure that the knee does not protrude beyond the border of the toe. The number of squats depends on the person’s preparedness. You can do from 5 to 50 squats. Their number increases gradually.
- You need to stand in front of the table, holding onto its edge with one hand. The straight leg is pulled back. You cannot bend at the waist or lean forward. The movement is performed 5-10 times.
Exercises to strengthen your arms:
- To perform the actions you will need two dumbbells of 1-1.5 kg each.
- Hands with dumbbells rise up. The limbs are bent alternately behind the head. Shoulders cannot be raised; they must be motionless. You must lift dumbbells at least 10 times. Over time, the number of ascents increases up to 20 times.
- You need to sit on the edge of the chair and lower your hands with dumbbells down. Feet are placed shoulder width apart. Hands bend at the elbows, dumbbells approach shoulder joints. The back and shoulders should remain motionless. The load should only be on your hands.
It is recommended that you perform muscle stretching exercises very carefully. They are performed at the end of the workout, slowly and smoothly. This helps improve quality such as flexibility. If this quality is sufficiently developed, the likelihood of getting injured decreases several times, especially during training.
By doing these exercises at least year, the person will feel a noticeable improvement in well-being. Fatigue and weakness will not appear. Endurance, vigor, and energy will appear. To begin with, you need to exercise for ten minutes, gradually increasing the load and time, bringing it to thirty minutes.
After performing the exercises, the muscles may ache slightly at first, but after a few days the pain goes away. If it remains, it is not possible to perform gymnastics, you need to consult a doctor and find the cause of the pain and discomfort.

Thus, gymnastics has a beneficial effect on the body of a woman of this age. This means that with regular exercise you can achieve not only fitness, but also good health. The woman will look younger, the aging process will slow down, joints and muscles will be strengthened, and overall health will improve. Proper, regular exercise will help you remain a healthy person.
Elderly people face social problems,
health problems,
lack of attention from surrounding people.
Let's clarify the age names:
- Old age – 60 – 70 years;
- Senile age – 70 – 80 years;
- Centenarians - over 80 years old.
In old age, as a rule, there are many different chronic diseases accumulated throughout life. The aging body gradually loses the ability to produce “youth” hormones - sex hormones, as well as adrenal hormones, which reduce the likelihood of exacerbations of previously suffered diseases.
There is no doubt that any disease leaves some consequences. In youth, this is not so noticeable, but with age, due to the atrophy of organs and the extinction of their functions, the body has difficulty coping with stress, immunity decreases, a person quickly gets tired, and chronic diseases often worsen, which often have an atypical course with insufficiently expressed symptoms. Something always hurts. Some women tend to think that they have been jinxed. But there is no one to blame.
Life goes on, and you need to strive to improve and strengthen the body, maintain self-care skills, and not let yourself relax: try to do what you can homework, maintain cleanliness and order in the home and hygiene of the body, monitor appearance, be neat and collected (thoughtful) in order to rationally carry out the necessary tasks and save energy and time, which “flies” faster and faster with age.
Physiotherapy necessary for older people. Indeed, with such most common diseases as spinal osteochondrosis, bone osteoporosis, arthrosis, vegetative - vascular dystonia, sleep disorders, hypertension, diseases internal organs, metabolic disorders and other diseases, the body needs compensation (adaptation to internal and external conditions that are important for health and life expectancy).

Skeletal changes in bone osteoporosis.
When selecting physical activity for older people, we take into account that metabolism is reduced, the content of under-oxidized breakdown products is increased (easy fatigue, overwork should not be allowed);
there are changes in the skeleton, increased tone and decreased muscle strength, impaired posture and gait due to a shift in the center of gravity;
possible cerebrovascular accidents, encephalopathy, problems with coordination of movements and balance;
there may be prolapse of internal organs, urinary incontinence;
decreased vital capacity of the lungs, dystrophy of the heart muscle.
In older patients, there is limited movement of the eyeballs (especially upwards), you have to turn your head, and you may feel dizzy.
We must also remember about age-related changes in the psyche. With age, pre-existing character flaws worsen. Emotional lability appears (tearfulness, moodiness, grumpiness), apathy, and there is a reluctance to exercise.
Because of constant feeling Fatigue and illness may make it difficult for older people to perform exercises. And yet you need to force yourself to overcome the malaise and, starting with the simplest exercises, gradually increase your physical activity. Physical exercise is an excellent means of preventing body disorders, and therapeutic exercises for the elderly improves quality of life in many diseases, increases self-confidence and improves mood.
External control is very important of cardio-vascular system to avoid myocardial infarction.
Need to determine heart reserve. To do this, you need to calculate the maximum permissible heart rate during physical activity and heart rate at rest in 1 minute.
HR (heart rate) maximum = 180 – age.
For example, age 62 years. Maximum heart rate = 180 – 62 = 118 (beats per minute).
Use a stopwatch to calculate your resting heart rate (after 15 minutes of rest) in one minute. Let's say 84 beats per minute.
HR (heart reserve) = maximum heart rate – resting heart rate.
RS = 118 – 84 = 34 beats per minute (100%). This means that your heart rate during physical activity should not be higher than 118 beats per minute. And you need to know the heart reserve because for people over 60 years old it is not necessary to give a 100% load.
In old age (60–70 years), we use up to 90% of the heart reserve.
In the elderly (70 – 80 years old) – up to 50%.
For centenarians – no more than 40%.
We approach this gradually, starting with the load
20% of individual heart reserve.
So, for example, at the age of 62 years, the heart reserve at a resting heart rate of 84 beats per minute is 34 beats per minute - this is 100%.
During the first lessons therapeutic exercises you can allow an increase in heart rate by 20% - in this example, by 7 beats per minute.
And in the future, after gradual adaptation to physical activity, you can allow an increase in heart rate to 90% of the heart reserve - in this example, by 30 beats per minute.
So, in this example, at the age of 62 years and with a heart rate at rest of 84 beats per minute in the first classes, we allow an increase in the heart rate by 7 beats per minute (= 91 beats per minute), gradually increasing the load, we allow the heart rate to reach 90% of the heart reserve (at 30 beats per minute). Heart rate will be up to 114 beats per minute.
Now take a piece of paper and a pen, a watch with a second hand, sit in a chair for 15 minutes to rest.
1). Write how old you are.
2). Now subtract this number from 180. Write: “The maximum heart rate is …”.
3). Calculate the heart rate for 1 minute using the second hand and write this figure as follows: “Pulse at rest is …”.
4). Calculate cardiac reserve using the above formula. (HR (heart reserve) = maximum heart rate - resting heart rate). Write this number.
You can adjust the load from 20% to 90% of your heart reserve by monitoring your heart rate during exercise.

Classes using the small group method in the clinic.
Small group classes are useful for older people, as this involves communication with peers, which older people really like. But you can practice on your own at home.
Exercises for everything muscle groups.
Class density is 50 - 60%. The rest of the time is used for counting the pulse, demonstrating exercises, changing the starting position, and static breathing exercises.
The duration of the lesson is no more than 30 minutes, 2 – 3 times a week.
All initial positions are acceptable, but ref. the standing position should not prevail.
Exercises with sharp turns and bends are excluded. Dthe movements are smooth, the pace is slow.
Exercises for balance and vestibular functions are required.
It is necessary to know what factors contribute to poor balance and unexpected falls in older people.
- Tremor of the limbs.
- Increased reaction time.
- Weakness of the hip and leg extensor muscles.
- Orthostatic hypotension (a sharp drop in blood pressure with a rapid change in body position from the initial lying position to a standing position.
- Visual and hearing impairments.
- Shifting the center of gravity forward.
- The cervical-diaphyseal angle is changed (from obtuse it becomes straight), which reflexively affects cerebral circulation.
- In men, it is difficult to bring their legs together; in women, on the contrary, they spread their legs apart, which makes it difficult to maintain stability when losing balance.
Falls must be excluded, since with osteoporosis, falling from a height can result in bone fractures and other injuries.
Therapeutic gymnastics for the elderly carried out only when satisfactory condition of the patient.
Contraindications for group classes is urinary incontinence and a categorical refusal to exercise.
Version of a set of exercises for the elderly for copying without pictures.
Let's prepare a ball the size of an orange (or better yet, an orange), gymnastic stick(the length of the stick is selected as follows: the distance from the left shoulder joint to the fingertips of the right hand straightened towards the side or while standing, measure the distance from the floor to the xiphoid process of the sternum, subtract 10 from this figure).
1). "Open - close." Hands on knees, feet shoulder-width apart. 1- Hands to shoulders (start of inhalation). 2- Straighten your arms to the sides, open your palms (inhale). 3- Hands to shoulders again (beginning of exhalation). 4- Place your hands on your knees and bend forward slightly (exhale). 4 times.
2). “Raise your leg.” Hold the seat of the chair with your hands. 1- Raise your straightened right leg. 2- Lower into original. position. 3- Raise the straightened left leg. 4- Return to original. position. 4 times.
3). "Shoulder rotations." Hands to shoulders, feet shoulder-width apart. 1, 2, 3, 4 – Draw one large circle with your elbows. 4 times. Then do the same in the opposite direction 4 times.
4). "One foot at a time." Hold the seat with your hands, legs spread wide. 1 - Place your right leg on top of your left, squeezing the muscles tightly pelvic floor(inhale). 2 - Return to original. position (exhalation). 3 - Place your left leg on your right, squeeze your pelvic floor muscles (inhale). 4 - Return to original. position (exhalation). 4 times.
5). "We're swinging the stick." (Balance exercise). Place the gymnastic stick vertically with one end on the floor, press the lower end with your feet, spread your knees wide, place your hands on the upper end of the stick on top of each other. 1 – Leaning on the stick, straighten your arms forward, slowly leaning forward so that your head drops between your hands at ear level (exhale). 2 - Return to original. position (inhalation). 6 times slowly.
6). “Put the stick vertically.” Take the stick between your palms so that the ends of the stick rest against the middle of your palms, lower the stick down (on your hips), feet shoulder-width apart. 1 – Place the stick vertically on your right leg so that your right hand is at the top and the left is at the bottom (inhale), look at your right hand. 2 – Return to the starting position (exhale). 3 - Place the stick vertically on your left leg so that your left hand is at the top and the right hand is at the bottom (inhale), look at left hand. 4 – Return to the starting position (exhale). 4 times.
7). “Roll a stick on your back.” Press the stick to your back with your elbows, legs apart for stability. Move the stick along your back with your elbows up (inhale) - down (exhale), do not bend over, keep your back straight.
8). Diaphragmatic breathing 6 times. Place your hands on your stomach, bend your legs at the knees. 1 – inhale through the nose, inflating the stomach. 2 – Exhale through the mouth in a thin stream slowly, pursing your lips into a tube; the stomach “deflates”, pull the abdominal wall “into itself”.
9). "Ball under the knee." Arms to the sides, ball (orange) in the right hand, straightened legs together. 1 – Bend your right leg, transfer the ball under your knee to your left hand (exhale). 2 - Return to the starting position (inhale), ball in your left hand. 3 – Bend your left leg, transfer the ball under your knee to your right hand (exhale).
10). “The ball is in the other hand with a turn.” Arms to the sides, ball (orange) in the right hand, straightened legs together. 1 – Raise your right hand with the ball and move the ball to your left hand, turn your body to the left, take the ball in your left hand (exhale). 2 - Return to the starting position (inhale). 3 – Also transfer the ball to your right hand, turning your body to the right (exhale). 4 - Return to the starting position (inhale). 3 times.
eleven). “The ball is in the other hand behind the head.” Arms along the body, ball in the right hand, legs straightened. 1 – Hands slide across the floor behind your head, pass the ball to your left hand, without moving your head, raise your eyes towards the ball (inhale). 2 - Return to the starting position (exhale). 3 – Place the ball behind your head in your right hand, raise your eyes up (inhale). 4 - Return to the starting position (exhale). 3 times.
12). “Rotate your hands and feet.” Arms bent at the elbows, hands in fists, feet shoulder-width apart. Slowly and smoothly rotate your fists and feet inward, then in the opposite direction for 4 circles. Repeat again.
13). Arms along the body, legs straightened. 1 – Raise your right hand up and place it on the floor behind your head, while simultaneously bending your left leg at the knee, sliding your foot along the floor (inhale). 2 - Return to the starting position (exhale). 3 – Raise your left arm up, bend your right leg at the knee, sliding your foot along the floor (inhale).
14). "Tension - relaxation." Arms along the body, legs straightened. 1 – Clench your hands into fists, your feet towards you, and squeeze your buttocks tightly (inhale). 2 – Relax all muscles (exhale). 6 times.
15). "Opposite limbs to the sides." Arms along the body, legs straightened. 1 - Move your right arm and left leg to the sides (inhale). 2 - Return to the starting position (exhale). 3 – Same with left arm, right leg (inhale). 4 - Return to the starting position (exhale). 4 times.
16). Diaphragmatic breathing 6 times. (See exercise No. 8).
We count the pulse for one minute and write it down. (Pulse should not exceed maximum heart rate).
17). “Rest your head in your hands.” Arms bent at the elbows, lying in front of you, head raised, look up. 1 – Lower your head onto your hands with your right ear, turning it to the left (exhale), relaxation. 2 - Return to the starting position, raise your eyes up (inhale). 3 – Place your head on your hands on your left ear, relax (exhale). 4 - Return to the starting position, eyes looking up (inhale). 4 times.
18). "Hands on the pelvis." Arms extended forward, legs straightened. 1 – Place your right hand on your pelvis. 2 – Place your left hand on your pelvis, head and thoracic region lift up, look forward. 3, 4 – Return to the starting position in reverse order, relaxing. 3 times.
19). "Beach". The head lies on the hands. Alternately - counter flexion and extension of the legs at the knee joints.
20). “Raise opposite limbs.” 1 – Raise your right arm forward, left leg back, maintain balance (inhale). 2 - Return to the starting position (exhale). 3 – Raise your left arm, right leg (inhale). 4 - Return to the starting position (exhale). 4 times.
21). "Look at the hand." 1 – Raise your right hand to the side - up, look at it (inhale). 2 - Return to the starting position (exhale). 3 – Raise your left hand to the side - up, look at it (inhale). 4 - Return to the starting position (exhale).
22). “Stretch your hand forward.” 1 – The right hand slides forward as far as possible, lower the head (exhale). 2 - Return to the starting position (inhale). 3 – The left hand slides forward, lower the head (inhale). 4 - Return to the starting position (inhale). 3 times.
We count the pulse for one minute and write it down. (Pulse should not exceed maximum heart rate).
23). Lying on your back, diaphragmatic breathing 6 times. (See No. 8).
24). “Kitty” (Bend and arch your back).
25). “Fox tail” (Bending of the spine now to the right, now to the left).
26). Sitting on a chair, hands hold the seat. Rolling from heel to toe.
27). Sitting on a chair, hands on knees. Raise your arms up to your sides (inhale), lower them to your knees, and bend forward slightly (exhale). 5 times.
Homework.
2). Train the vestibular system: lying on the bed on your back, bend your knees, turn on your side, lower your legs off the bed and, pushing off with your hands, sit on the edge of the bed for a few seconds, stand up (spread your legs shoulder-width apart), straighten up, stand for a while, trampling from foot to foot. Now, in reverse order, lie on the bed in the other direction. 3 times in each direction slowly, monitoring your well-being. Avoid dizziness. You can simplify the task by eliminating standing up.
3). Diaphragmatic breathing 6 times before bed. (This exercise helps with the appearance of chest pain due to angina pectoris, since the diaphragm, rising and falling, promotes the movement of blood in the systemic circulation, facilitating the work of the heart).
4). Self-massage of hands and fingers. Exercises for fingers (“Coins” - circular movements thumb on the tips of all other fingers, “Shalbans with all fingers in turn”, “Buttons” - press the thumb on the tips of all fingers in turn, “Figurines between all fingers”, “Call to you with all fingers in turn”, “Straighten each finger in turn from the fist” , “Straighten and spread all your fingers - clench your fingers into fists.”
5). Long walks, you can run (breathe only through your nose, if there is not enough air, start walking), in winter skiing, swimming in the pool and classes in a health group according to age are useful. Remember to monitor your blood pressure and pulse.
6). Gymnastics for the eyes.
Let's prepare a ball the size of an orange (or better yet, a real orange),
gymnastic stick ( gymnastic stick length: the distance from the left shoulder joint to the fingertips of the right arm straightened towards the side or standing, measure the distance from the floor to the xiphoid process of the sternum, subtract 10 from this figure),
chair with backrest and rug.
Let's ventilate the room.
Starting position sitting on a chair.
1). "Open - close."
Hands on knees, feet shoulder-width apart.
1- Hands to shoulders (start of inhalation).
2- Straighten your arms to the sides, open your palms (inhale).
3- Hands to shoulders again (beginning of exhalation).
4- Place your hands on your knees and bend forward slightly (exhale). 4 times.
Initial position.

Once! Start of inhalation.

Two! Inhale.
Three! Beginning of exhalation.

Four! Exhale deeply.
2). “Raise your leg.”
Hold the seat of the chair with your hands.
1- Raise your straightened right leg.
2- Lower into original. position.
3- Raise your straightened left leg.
4- Return to original. position. 4 times.
Initial position.

Once! Raise your right leg. Inhale.

Two! Exhalation.

Three! Left leg! Inhale.
3). "Shoulder rotations."
Hands to shoulders, feet shoulder-width apart.
1, 2, 3, 4 – Draw one large circle with your elbows. 4 times.
Then do the same in the opposite direction 4 times.

Once! Circular rotations of the arms in the shoulder joints.

Two!

Three!

Four!
And repeat in the other direction 4 times.
4). "One foot at a time."
Hold the seat with your hands, legs spread wide.
1 - Place your right leg on your left, tightly squeeze your pelvic floor muscles (inhale).
2 - Return to original. position (exhalation).
3 - Place your left leg on your right, squeeze your pelvic floor muscles (inhale).
4 - Return to original. position (exhalation). 4 times.
Place your feet shoulder-width apart.

Right leg - One! Squeeze your patience muscles. Inhale.

Two! Exhalation.

Left leg - Three! Squeeze your patience muscles. Inhale.
Four! Exhalation.
5). "We're swinging the stick."(Balance exercise). Place the gymnastic stick vertically with one end on the floor, press the lower end with your feet, spread your knees wide, place your hands on the upper end of the stick on top of each other.
1 – Leaning on the stick, straighten your arms forward, slowly leaning forward so that your head drops between your hands at ear level (exhale).
2 - Return to original. position (inhalation). 6 times slowly.
Initial position.

Once! Exhalation.

Two! Inhale. Stick to the chest, straighten your back.
If dizziness does not bother you, then this exercise can be complicated by securing the lower end of the stick with your feet, and slowly rotating the upper end, bending deeply forward, then straightening up, bringing the upper end of the stick to the sternum (clockwise and counterclockwise).
6). “Put the stick vertically.”
Take the stick between your palms so that the ends of the stick rest against the middle of your palms, lower the stick down (on your hips), feet shoulder-width apart.
1 – Place the stick vertically on your right leg so that your right hand is at the top and the left is at the bottom (inhale), look at your right hand.
2 – Return to the starting position (exhale).
3 - Place the stick vertically on your left leg so that your left hand is at the top and the right hand is at the bottom (inhale), look at your left hand.
4 – Return to the starting position (exhale). 4 times.
Initial position. A stick between the palms.

Once! Inhale.

Two! Exhalation.

Three! Inhale.
Four! Exhalation.
7). “Roll a stick on your back.”
Press the stick to your back with your elbows, legs apart for stability.
Move the stick along your back with your elbows up (inhale) - down (exhale), do not bend over, keep your back straight.
Initial position.

Inhale - stick up.

Exhale - stick down.
We count the pulse for one minute and write it down. (Pulse should not exceed maximum heart rate).
Let's calculate the pulse in 1 minute.
Starting position lying on your back.
(Pillow under the head to reduce the risk of high blood pressure).
8). Diaphragmatic breathing 6 times. Place your hands on your stomach, bend your legs at the knees.
1 – inhale through the nose, inflating the stomach.
2 – Exhale through the mouth in a thin stream slowly, pursing your lips into a tube; the stomach “deflates”, pull the abdominal wall “into itself”.
Diaphragmatic breathing. Inhale through the nose, “inflate” the stomach.

Diaphragmatic breathing. Exhale through your mouth in a thin stream, pursing your lips into a tube.
9). "Ball under the knee."
1 – Bend your right leg, transfer the ball under your knee to your left hand (exhale).
2 - Return to the starting position (inhale), ball in your left hand.
3 – Bend your left leg, transfer the ball under your knee to your right hand (exhale).
4 - Return to the starting position (inhale). 3 times.

Once! Place the ball in your left hand under your knee. Exhalation.

Two! Inhale. The ball is in the left hand.

Three! Place the ball in your right hand under your left knee. Exhalation.

Four! Ref. position. Inhale. The ball is in the right hand.
10). "Ball in the other hand with a turn".
Arms to the sides, ball (orange) in the right hand, straightened legs together.
1 – Raise your right hand with the ball and move the ball to your left hand, turn your body to the left, take the ball in your left hand (exhale).
3 – Also transfer the ball to your right hand, turning your body to the right (exhale).
4 - Return to the starting position (inhale). 3 times.
Ref. position. Inhale.
Once! Exhalation.

Two! Inhale.

Three! Exhalation.

Four! Ref. position. Inhale.
11). "Ball in the other hand behind the head".
Arms along the body, ball in the right hand, legs straightened.
1 – Hands slide across the floor behind your head, pass the ball to your left hand, without moving your head, raise your eyes towards the ball (inhale).
3 – Place the ball behind your head in your right hand, raise your eyes up (inhale).
4 - Return to the starting position (exhale). 3 times.
Ref. position. The ball is in the right hand.

Once! Hands up, inhale. Ball in left hand.

Two! lower your arms along your body. Exhalation. The ball is in the left hand.

Three! Inhale. Ball in the right hand.

Four! Ref. position. The ball is in the right hand.
12). “Rotate your hands and feet”.
Arms bent at the elbows, hands in fists, feet shoulder-width apart. Slowly and smoothly rotate your fists and feet inward, then in the opposite direction for 4 circles.
Repeat again.
At the same time, we rotate our hands and feet slowly and efficiently.

At the same time, we rotate our hands and feet slowly in one direction, then in the other direction.
13). "Raise your arm, bend your leg".
1 – Raise your right hand up and place it on the floor behind your head, while simultaneously bending your left leg at the knee, sliding your foot along the floor (inhale).
2 - Return to the starting position (exhale).
3 – Raise your left arm up, bend your right leg at the knee, sliding your foot along the floor (inhale).
4 - Return to the starting position (exhale). 4 times.
Initial position.

Once! Right hand, left foot! Inhale.

Two! Exhalation.

Three! Left hand, right foot! Inhale.
Four! Exhalation.
14). "Tension - relaxation". Arms along the body, legs straightened.
1 – Clench your hands into fists, your feet towards you, and squeeze your buttocks tightly (inhale).
2 – Relax all muscles (exhale). 6 times.
Once! Squeeze your hands into fists, lift your feet towards you, and squeeze your buttocks! Inhale.

Two! Straighten your fingers and stretch your toes. Exhalation.
15). "Opposite limbs to the sides".
Arms along the body, legs straightened.
1 - Move your right arm and left leg to the sides (inhale).
2 - Return to the starting position (exhale).
3 – Same with left arm, right leg (inhale).
4 - Return to the starting position (exhale). 4 times.
Initial position.

Once! Inhale. Right hand, left foot!

Two! Exhalation. Initial position.

Three! Inhale. Left hand, right foot!
Four! Exhalation. Initial position.
16). Diaphragmatic breathing 6 times. (See exercise No. 8).
We count the pulse for one minute and write it down. (Pulse should not exceed maximum heart rate).
Starting position lying on your stomach.
17). “Rest your head in your hands.”
Hands bent at the elbows, lie in front of you, raise your head, look up.
1 – Lower your head onto your hands with your right ear, turning it to the left (exhale), relaxation.
2 - Return to the starting position, raise your eyes up (inhale).
3 – Place your head on your hands on your left ear, relax (exhale).
4 - Return to the starting position, eyes looking up (inhale).
4 times.
Initial position. Inhale.
Once! put your head on your right ear. Exhalation.

Two! Inhale. Initial position.

Three! Exhalation. Place your head on your left ear.
Four! Inhale. Initial position.
18). "Hands on the pelvis." Arms extended forward, legs straightened.
1 – Place your right hand on your pelvis.
2 – Place your left hand on your pelvis, raise your head and chest, look forward.
3, 4 – Return to the starting position in reverse order, relaxing. 3 times.

Initial position.

Once! Start of inhalation.

Two! Inhale.

Three! Beginning of exhalation.

Four! Exhalation.
19). "Beach". The head lies on the hands. Alternately - counter flexion and extension of the legs at the knee joints.
Alternately - counter movement of the legs. The body is relaxed.

Alternately - counter movement of the legs.
The starting position is knee-wrist.
20). “Raise opposite limbs.”
1 – Raise your right arm forward, left leg back, maintain balance (inhale).
2 - Return to the starting position (exhale).
3 – Raise your left arm, right leg (inhale).
4 - Return to the starting position (exhale). 4 times.
Initial position.

Once! Inhale.

Two! Exhalation.

Three! Inhale.
21). "Look at the hand."
1 – Raise your right hand to the side - up, look at it (inhale).
2 - Return to the starting position (exhale).
3 – Raise your left hand to the side - up, look at it (inhale).
4 - Return to the starting position (exhale).
Initial position.

Once! Inhale.

Three! Inhale.
22). “Stretch your hand forward.”
1 – The right hand slides forward as far as possible, lower the head (exhale).
2 - Return to the starting position (inhale).
3 – The left hand slides forward, lower the head (inhale).
4 - Return to the starting position (inhale). 3 times.
Initial position.

Once! Exhalation. We're reaching out right hand forward.
Two! Inhale.

Three! Exhalation. We stretch our left hand forward.
Four! Exhalation.
23). "Kitty."
1- Bend down (inhale).
2- Arch your back up, head down (exhale). 4 times.

"Kitty." Bend your back down. Inhale.
"Kitty." arch your back upward. Exhalation.
24). "Fox Tail" 1- Move your feet and head to the right with your ear towards your right shoulder. Inhale.
2- Ref. position (exhalation).
3- Move your feet and head to the left to the left shoulder (inhale).
4- Ref. position (exhalation). 4 times.

Once! Inhale.
Two! Exhalation.

Three! Inhale.
Four! Exhalation. Initial position.
We count the pulse for one minute and write it down. (Pulse should not exceed maximum heart rate).
Roll your feet onto your heels.

Roll from heel to toe.
27). Sitting on a chair , hands on knees.
1, 2 - Raise your arms up through your sides (inhale).
3, 4 - Lower to your knees, bend forward slightly (exhale). 5 times.
Initial position.

Once! Hands up, raise your eyes. Start of inhalation.

Two! Hands up. Inhale.

Three! arms to the sides, exhalation begins.

Four! Exhale deeply, bend forward, resting your hands on your knees.
Homework.
1). Self-massage of the back with a roller back massager.

It is better to buy a back massager the size of a gymnastics stick so that you can roll it on your back with your elbows.

Body Massager.

Back massager.

Back massager.

Back massager.

Massage mat for feet.
2). Train the vestibular system: lying on the bed on your back, bend your knees, turn on your side, lower your legs off the bed and, pushing off with your hands, sit on the edge of the bed for a few seconds, stand up (spread your legs shoulder-width apart), straighten up, stand for a while, trampling from foot to foot. Now, in reverse order, lie on the bed in the other direction. 3 times each wayslowly, monitoring your well-being. Avoid dizziness. You can simplify the task by eliminating standing up.

We practice getting up and lying down.

First, bend your knees.

Bend your knees towards the edge of the bed and turn onto your side.

Lower your legs off the bed and, pushing with your hands, sit on the edge of the bed.

Slowly sit on the edge of the bed and sit for a while to get used to the upright position.
Stand up decisively, legs apart for stability, arms to the sides. Maintain balance.
Sit down slowly and smoothly, leaning forward slightly, without falling onto the bed.

Lie on the other side, put your feet on the bed.

Turn onto your back. (Training to change body position).
3). Diaphragmatic breathing 6 times before bed. (This exercise also helps with the appearance of chest pain due to angina pectoris, since the diaphragm, rising and falling, promotes the movement of blood in the systemic circulation, significantly facilitating the work of the heart).
4). Self-massage of hands and fingers.
5). .
“Coins” - circular movements with the thumb on the tips of all other fingers,
“Shalbans with all fingers alternately”,
“Buttons” - press with your thumb on the tips of all fingers in turn,
"Figurines between all fingers",
“Call to you with all fingers in turn”,
“Straighten each finger in turn from the fist”,
“Straighten and spread all your fingers - clench your fingers into fists”.
6). Long walks, you can run (breathe only through your nose, if there is not enough air, go to walking), skiing in winter, swimming in the pool and classes in a health group according to age are useful. Remember to monitor your blood pressure and pulse.
7). .

Health group in the pool.
2. Buy a modern exercise bike (increases blood circulation in the pelvis) or an elliptical trainer.It creates an imitation of movement when running, creates a vertical load on the bones lower limbs, which helps strengthen bones during osteoporosis and to prevent osteoporosis, the heart muscle also receives good load. It is better to buy a magnetic ellipsoid, as it works quietly and smoothly, is very pleasant, and makes you want to practice on it. There is monitoring of the cardiovascular system and other capabilities.
(4
votes, average: 3,75
out of 5)
It is difficult to say when you should do gymnastics - in youth or old age. Only one thing is clear: physical activity protects the body from the development of various diseases.
 Morning gymnastics for older women with free video
 However, for women, videos with lessons that can be watched on the Internet can not only keep the body healthy, but also improve memory and a clear mind.
Charging for the elderly
Everyone needs to do morning exercises, regardless of age. Let's consider a small complex morning exercises for older people:
- This exercise can be performed in bed. Straighten your legs and place your arms along your body. Then raise one arm up for a few seconds and lower it. The same with the other hand.
- IN supine position straighten your legs, bend your elbows, clench your fingers into a fist. Rotate the brush from left to right and vice versa.
- While sitting on a chair, straighten your legs and keep your back straight. Then, holding the chair with your hands, lift one leg and begin to bend and then straighten your toes. Then make rotational movements with your foot. Repeat the exercise with the other leg.
- The exercise is performed in a standing position. Place your feet together and lower your arms. Next, walk in place, first on your toes, then on your heels.
- Place your feet a little wider, then raise your right hand up and place your left hand behind you. After a couple of seconds, change the position of your hands, stretch and inhale. Return to the original position and exhale.
- Place your feet wider than shoulder width and your hands on your shoulders. Then start making rotational movements with your pelvis to the right, then to the left.
 Charging for the elderly
 Due to inactivity, obesity appears, which occurs not only in young people, but also in older people. No less important is exercise for older women, which activates and improves the performance of internal organs, so its absence can cause the appearance of excess weight. Physical activity is the key to health at any age.
 Exercises for obese older women
 Exists special women, a free video that you can download and practice at home. Let's look at a few exercises that help get rid of obesity in old age:
- Slow walking with gradual acceleration and deceleration again. Perform for 2 minutes.
- Place your hands on your shoulders, then rotate your shoulders in circles.
- In a standing position, your legs are wider. We bend forward and try to touch our toes or the floor with our fingers. As you straighten, inhale and spread your arms to the sides.
- Perform half squats with support on a chair.
- Standing between 2 chairs, lean on the backs and swing your legs forward and backward.
- Lean on the back of a chair and swing your legs to the sides.
- Sit on a chair and place your hands on your waist. As you inhale, pull your elbows back, and as you exhale, bring them together.
- In a standing position, place your hands on your waist. Next, walk, bending your legs high.
- While standing, place your hands on your shoulders. As you inhale, spread your shoulders, and as you exhale, contract them.
- Walk slowly with gradual acceleration, then walk slowly for one minute and return to a calm walk again.
- IN sitting position perform slow breathing exercises.
These women are presented in the video and can be downloaded for free on the Internet. It is recommended to perform gymnastics in the morning.
Let's look at several exercises for obese older women, which also need to be performed in the morning:
 Gymnastics for obese older women
 - While lying down, stretch your legs alternately.
- In a lying position, while inhaling, raise your arms and place them behind your head, then exhale and lower.
- Do the bicycle exercise.
- Walk around the room slowly at first, then speed up and slow down again - about 2 minutes.
- Standing, arms to the sides, when inhaling, lift them up, and when exhaling, lower them.
- Standing, bend your arms slightly and clench them into a fist. Next, imitate the movements of a boxer.
- Walk in place - about 2 minutes.
- Standing, leaning against a wall or the back of a chair, move one leg and arm to the sides, then the other leg and arm.
- Sit on a chair, then stand up. Do it 5 times.
- Walk straight for 3 minutes.
- Sit on a chair. As you inhale, spread your arms and right leg to the sides, and as you exhale, bring them together. Then do it on the other leg.
- Sit on a chair. Breathe slowly and calmly.
It's simple morning women, which is easy to remember if you watch video lessons.
The elasticity and strength of muscles decreases with age, so women who do not exercise physical activity for quite a long time, they are exposed to various diseases, including back pain. Systematic exercise can strengthen the back muscles, relieve excess weight, diabetes and other diseases. Morning exercises for obese older women were presented above, and video lessons can be downloaded for free on the Internet.
 Gymnastics for women with back pain
 Inactivity causes muscles and joints to become inelastic.
The simplest type of exercise is walking, during which the muscles and joints begin to move, receive a load that improves the performance of the vestibular apparatus, the flexibility of the body increases, and the main muscle groups are strengthened. A 10-minute walk is enough to get started.
To extend life expectancy and its quality, for both men and women, it is extremely important to regulate eating behavior in a timely manner and refuse bad habits intensify and diversify physical activity. It is recommended to do physical exercises for older women starting from the age of 40, before the onset of menopause.
In this case, this complex process of hormonal changes will take place more or less easily, and the remaining inevitable, usually pronounced, signs of biological aging will appear not by the age of 60-75, but later. And this has been proven in practice and confirmed by medical research.
However, if you “didn’t have time” to start training on time, don’t despair. It's never too late to start exercising regularly for health purposes. The information, photos and videos in this article will help older women begin the process of working on their body and psyche, even if their level physical training and poor health.
Featured below weekly plan physical activity is maximally optimized from the point of view of preventing and stopping typical diseases inherent in aging women. However, in the presence of obvious chronic pathologies of the second, and especially the third stage of development, a set of these measures must be approved by the attending physician.
The benefits of physical education for elderly and elderly women

Aging human body inevitably. Age-related changes occur at the cellular level: protein biosynthesis changes, the oxidative activity of enzymes decreases, the number of mitochondria decreases, and the functionality of cell membranes (membranes) is disrupted.
However, many natural physiological changes that occur in a fading female body can be significantly slowed down, and some can even be stopped temporarily, with the help of regular physical activity and adherence to healthy image life.
Here is a list of such conditions and diseases:
- osteoporosis;
- osteochondrosis;
- arthritis, arthrosis, gout;
- metabolic syndrome (weight gain), type 2 diabetes mellitus;
- disturbance of urodynamics and renal blood flow, decreased sphincter tone, prolapse of the pelvic organs, urinary incontinence when sneezing or laughing;
- increased blood pressure;
- cardiac ischemia;
- diseases caused by atherosclerosis, including damage to the veins in the legs;
- night cramps;
- sleep disorders;
- psychosomatic disorders;
- depression.
On a note. Physical exercises also successfully combat other diseases, injuries and fractures. Moreover, in many cases, exercise therapy is not an auxiliary, but the main type of treatment.
Weekly training plan and basic training rules

Unfortunately, there is no single physical exercise or set of different movements that would fight aging universally. However, alternating anaerobic exercise with aerobic exercise, static tension and relaxation with dynamic gymnastic exercises or yoga asanas, balance exercises and outdoor games, you can create an indicative plan for health-improving physical education classes for older women.
It should include:
- morning exercises and evening cool-down - daily;
- gymnastic exercise complex – 3 times a week for 45 minutes;
- aerobic exercise – 2 (3) times a week for 60 minutes;
- outdoor games and art therapy - during the week (depending on your well-being and mood).

In order for physical education to be as effective as possible and not cause harm to women of elegant age, the following “golden” rules must be followed:
- you should train regularly;
- to the complex physical exercise for older women, exercises should include joint gymnastics, stretching movements, exercises with dumbbells, Kegel exercises, coordination exercises, balances on one leg, breathing exercises;
- the pace of classes and exercises should be slow and/or medium;
- it is necessary to increase the level of physical activity gradually;
- You should not train during colds or infectious diseases, exacerbation of chronic pathologies, in the presence of elevated body temperature, high blood pressure, pain in any organ or part of the body.
When starting classes, even those older women who think they are in good health physical fitness, you should be careful when dosing loads. Not everyone will be able to immediately enter into a full weekly training schedule with the recommended duration of classes: for gymnastics - 45, and for cardio exercise 60 minutes.
Here's how to do it:
- For gymnastic training for older women at home, first, for 2 weeks, do only 2 blocks of the exercises below in a standing position. Then, for another 2 weeks, add exercises while sitting on a chair, and so on. Yes, this method has a drawback. Not all muscles and joints will be fully worked out immediately. Nevertheless, it is better to increase the load in this way, because most will not be able to evenly distribute efforts throughout the entire duration of the exercise, and therefore will be forced to interrupt it in the middle or at the end, or will receive muscle soreness as a negative consequence.
- To increase aerobic exercise, focus on your own feelings. Walk, swim, row or pedal until you feel tired. Then pause to rest. Then continue the training for another 3-5 minutes (at at a slow pace), and finish the lesson. As the cardiovascular and respiratory systems strengthen, the first time period will gradually increase on its own. This method of dosing cardio loads will not cause harm due to overcoming a specific distance or period of time through “I can’t, but I have to.”
For your information. You have to practice with a smile, literally forcing yourself to be in good mood. This approach is an effective, medically proven method of combating automatic (negative and obsessive) thoughts and depressive states of senility.
Morning exercises
One of the best options for morning exercises for older women is the popular author’s “Eye of Revival” system. Peter Kalder created it after visiting a Tibetan monastery. Practice shows that this complex, when performed regularly, really has a healing and rejuvenating effect on the body.

The exercises should be performed in the order shown in the figure. You should start with 3 repetitions of each movement. The dosage is increased gradually.
As a rule, +2 repetitions are added every week, but you don’t have to rush, focusing on your feelings. The maximum number of repetitions of each exercise is 21 times, which are performed in at a relaxed pace in 15 minutes.
If necessary, pay special attention to the joints of the wrists and fingers, increasing the number special exercises for them by inserting them into part 6.

How to do 5 correctly Tibetan pearls(rituals or exercises), what are the requirements that must be observed in relation to the entire selection of exercises, you can find out from this video. This is one of the best and most competent demonstrations of this complex.
To those who are like this morning exercises I don’t like it, perhaps this video set of exercises for older women will be suitable.
Universal gymnastics complex for older women
For women over 40 years old, it is important to begin to maintain coordination of movements and tone of the muscular-ligamentous apparatus, slow down the inevitable development of osteoporosis and osteochondrosis, keep body weight normal, maintain correct posture, flexibility of the spine and range of motion in the joints of the limbs.
A set of exercises is suitable for this, which must be done according to the following rules:
- the optimal number of classes per week is 3 times;
- duration of one lesson – 45 minutes;
- time of the lesson - 30 minutes after the second breakfast (11-30) or before dinner, but so that at least 20 minutes pass between the end of the lesson and the meal;
- sequence of exercises - strictly in the order indicated below;
- number of repetitions of each dynamic exercise– strictly by sensations, to the point of feeling slightly tired.
Attention! If during class a problem arises pain syndrome, stop doing the exercise immediately. You are doing it technically incorrectly, you have incorrectly calculated the dosage or the strength of tension (stretching). After a pause, you can try to continue training with next exercise, but if the pain returns, stop exercising. There is a reason to go to the doctor.
For the lesson you will need equipment:
- 3 balls for tennis or other objects suitable for juggling;
- dumbbells or convenient plastic bottles of suitable weight - individually (from 0.5 to 2 kg);
- stable stool;
- large towel;
- rug.
You should exercise in loose clothing and barefoot. It is worth taking care in advance about musical accompaniment and the availability of drinking water. Shortly before training, you should ventilate the room.
Warm-up
Before any physical exercise, you should do a warm-up. In our opinion, optimal preparatory exercises are movements from the vortex joint warm-up presented above.
Exercises while standing
Table 1 - Exercises for joints and muscles of the torso, arms and shoulder girdle:
| Images and title | Brief instructions |
 |
Do the exercises in the following algorithm. In the first 10-15 seconds, take a position so that the stretch is minimal and comfortable. Then exhale and intensify it a little for another 10-15 seconds. Breathe evenly and shallowly. Areas where you need to feel stretching are highlighted in orange, and tension in red. Additionally, stretch in the direction of the purple arrows. |
 |
Do 10 twists left and right. At the end of each turn, look at the wall, exhale, and try to touch the wall with your palms (A). Having completed last twist freeze, turning your head away from the wall as much as possible, look up, breathe shallowly (B). Feel the muscle stretch (blue zone) for 10 seconds, exhale, and twist a little for another 10 seconds. Repeat again, but with a final fade in the other direction. |
 |
Stand tall, fold your hands in prayer mudra (forearms parallel to the floor). Squeeze your palms with force. Keeping chest motionless, inhale and exhale with your stomach (while inhaling, protruding it, and while exhaling, retracting it), raise your arms up for 10 counts, without releasing the pressure in your palms. Lower your arms just as slowly. Do exercise 3 3 times. |
 |
Place your feet slightly narrower than your shoulders. Keep your head straight. Maintaining correct posture, raise your arms to the sides until they are parallel to the floor. During abduction, inhale, and when lowering your arms, exhale with emphasis. Repeat raising your arms to the sides until you get tired. Rest, and do 2 more sets, remembering to leave plenty of rest in between. |
 |
Spend 5 minutes juggling. This great exercise not only for coordination of movements. It perfectly stimulates the cerebellum, helps increase concentration, and strengthens the eye muscles. To avoid running after dropped balls, work on a sofa, bed or chair. Don't be afraid and don't despair. The movements may seem complicated, but they will turn out quite quickly. |
Between 2 blocks of exercises performed in a standing position, we suggest performing simple movements that, despite their simplicity, will support the vestibular apparatus. This is important because age-related changes (impairments) in its functioning affect gait and are the cause of dizziness and spontaneous falls in older people.

During one music track (3-5 minutes), walk with your feet in one line:
- forward and backward - with side steps (the toe of one foot touches the heel of the other), on high half-toes;
- forward - sliding step;
- at the end of the line of movement, make smooth turns of 180 degrees, rising on tiptoes;
- while walking, change the position of your hands - to the sides, up, behind your back in a lock, holding an imaginary balancing pole or tightrope walker's fan in your hands.
Advice. You can strengthen the training of the vestibular apparatus while walking along a line by increasing the number of turns or complicating them by performing a half, or maybe a full (360 degrees) turn on the toe of one leg, while further maintaining balance on an imaginary rope.
Table 2 - Exercises for joints and muscles of the torso, pelvic floor and legs:
| Image and title | Brief instructions |
 |
Starting position: basic stance, dumbbells in both hands. 1. Raising both arms to the sides, move your left leg to the side. You can put it on your toe, you can lift it up. Inhale. 2. Standing on your right leg, touch your right elbow to your left knee, lowering your left hand down. The back is straight, slight rotation of the body is possible. Exhalation. 3. = 2 (inhale), 4. = 1 (exhale). And on the other leg. Repeat until slightly tired. |
 |
Starting pose: basic stance 1. Cross lunge backward with your left leg, leaving your body weight on your “front” right leg. Exhalation. 2. Raise your right arm straight up, passing it across the side. At the same time, sit down a little lower. Inhale. 3. Return to position 1. Exhale. 4. Take the starting position. Inhale. Do the exercise in the other direction. Repeat until slightly tired. |
 |
Starting position, as in the photo. 1. Inhale, keeping your chest and arms still and your stomach sticking out. 2. As you exhale, lower your arms down, pull in your stomach and strongly tighten your pelvic floor muscles. This Kegel tension is the main movement of the exercise. All attention is on him. Freeze without breathing for 3-7 seconds. Inhaling, slowly return to the starting position. Repeat 6-12 times. |
 |
Place your feet wider than shoulder-width apart, with your toes turned outward. Interlace your fingers and place the resulting lock in the center of the sternum. Do slow (4 counts) half squats, and the same slow returns to the starting position. Keep your back and neck straight. When squatting, inhale, and when standing up, exhale. Dosage – individual (4-20 times). |
 |
In order to make swings with the fullest amplitude possible, perform swings by grasping a wall or the back of a chair. Condition - all parts of the body, except the legs, must be motionless. Breathing is shallow, arbitrary. 1. Make a “pendulum” with your knee back and forth. 16-20 times. 2. Perform 10-12 knee abductions to the side. Repeat on the other leg. |
 |
1. Rest your forehead and forearms against the wall, placing your legs in a lunge with your feet parallel. Push your pelvis towards the wall until some tension appears in calf muscle and Achilles tendon. After 10 seconds, increase the tension for another 10 seconds. 2. Relieve the tension in your lower leg and, using the same algorithm (10+10), stretch the side of your torso at the level of the hip joint, moving your shoulders to the opposite side. Repeat with the other leg. |

On a note. At any age, especially in old age, and especially women after 45 years of age, it is necessary to drink a sufficient amount of clean drinking water. It is necessary for the normal rate of regeneration of bone and cartilage tissue, as well as for maintaining the elasticity of the intervertebral discs. If you feel thirsty during training, quench it with a few sips of water or unsweetened compote.
Exercises while sitting on a chair
| Image and title | Brief instructions |
 |
Paying attention to maintaining the tone of the thigh and buttock muscles is extremely important. Their laxity can also result in an accidental fall, injury and fracture. Repeat until tired: 1. Lift your butt off the chair, keeping your back straight. Inhale. Return to the sitting position slowly, without flopping. 2. As you exhale, straighten your legs and turn your feet to the left, and on the next repetition - to the right. |
 |
Take dumbbells. 1. Spread your arms bent at the elbows, inhaling through your stomach. The chest is motionless. 2. As you exhale, bring your arms in front of you, pull in your stomach and tighten your pelvic floor muscles. Hold for 2, maximum 3 seconds. Repeat 10-12 times. Rest. Do the series again. |
 |
Sit backwards on a chair. 1. As you exhale, bend to the side, pulling one dumbbell under your arm, and try to touch the floor with the second. As you inhale, return to a straight position. Repeat on the other side. There are 12 inclinations in total. 2. Immediately do 12 torso twists (left + right), holding your arms as in the photo. Exhale at the extreme points of the rotation. |
 |
Continue to sit backwards in your chair. Raise the dumbbells up. 1. As you exhale, bend your arms. Do not spread your elbows to the sides. Your forearms should be parallel to the floor. 2. Inhaling and without moving your arms and head, bend in your chest. 3. As you exhale, return to position 1. 4. As you inhale, straighten your arms up. The pace is average and smooth. Repeat 12 times. |
 |
1. Sit on the edge of a chair with your feet on tiptoes. Check your posture. Stretch your head up. 2. Trying not to move your torso, raise your knees up. Freeze for 20-30 seconds (or as long as you can). Don't hold your breath. Breathe shallowly through your chest. 3. Slowly (!) return to pose 1. 4. Relax (you can round your back). Repeat 3-6 times. |
For your information. It is no coincidence that this complex includes quite a lot of exercises with dumbbells. They are recommended for older women as one of the main types of exercise to inhibit the processes of osteoporosis, control body weight and blood sugar levels. In addition, movements with dumbbells help maintain the elastic line of the inner part of the shoulder, which at this age begins to sag unsightly, preventing you from wearing short sleeves.
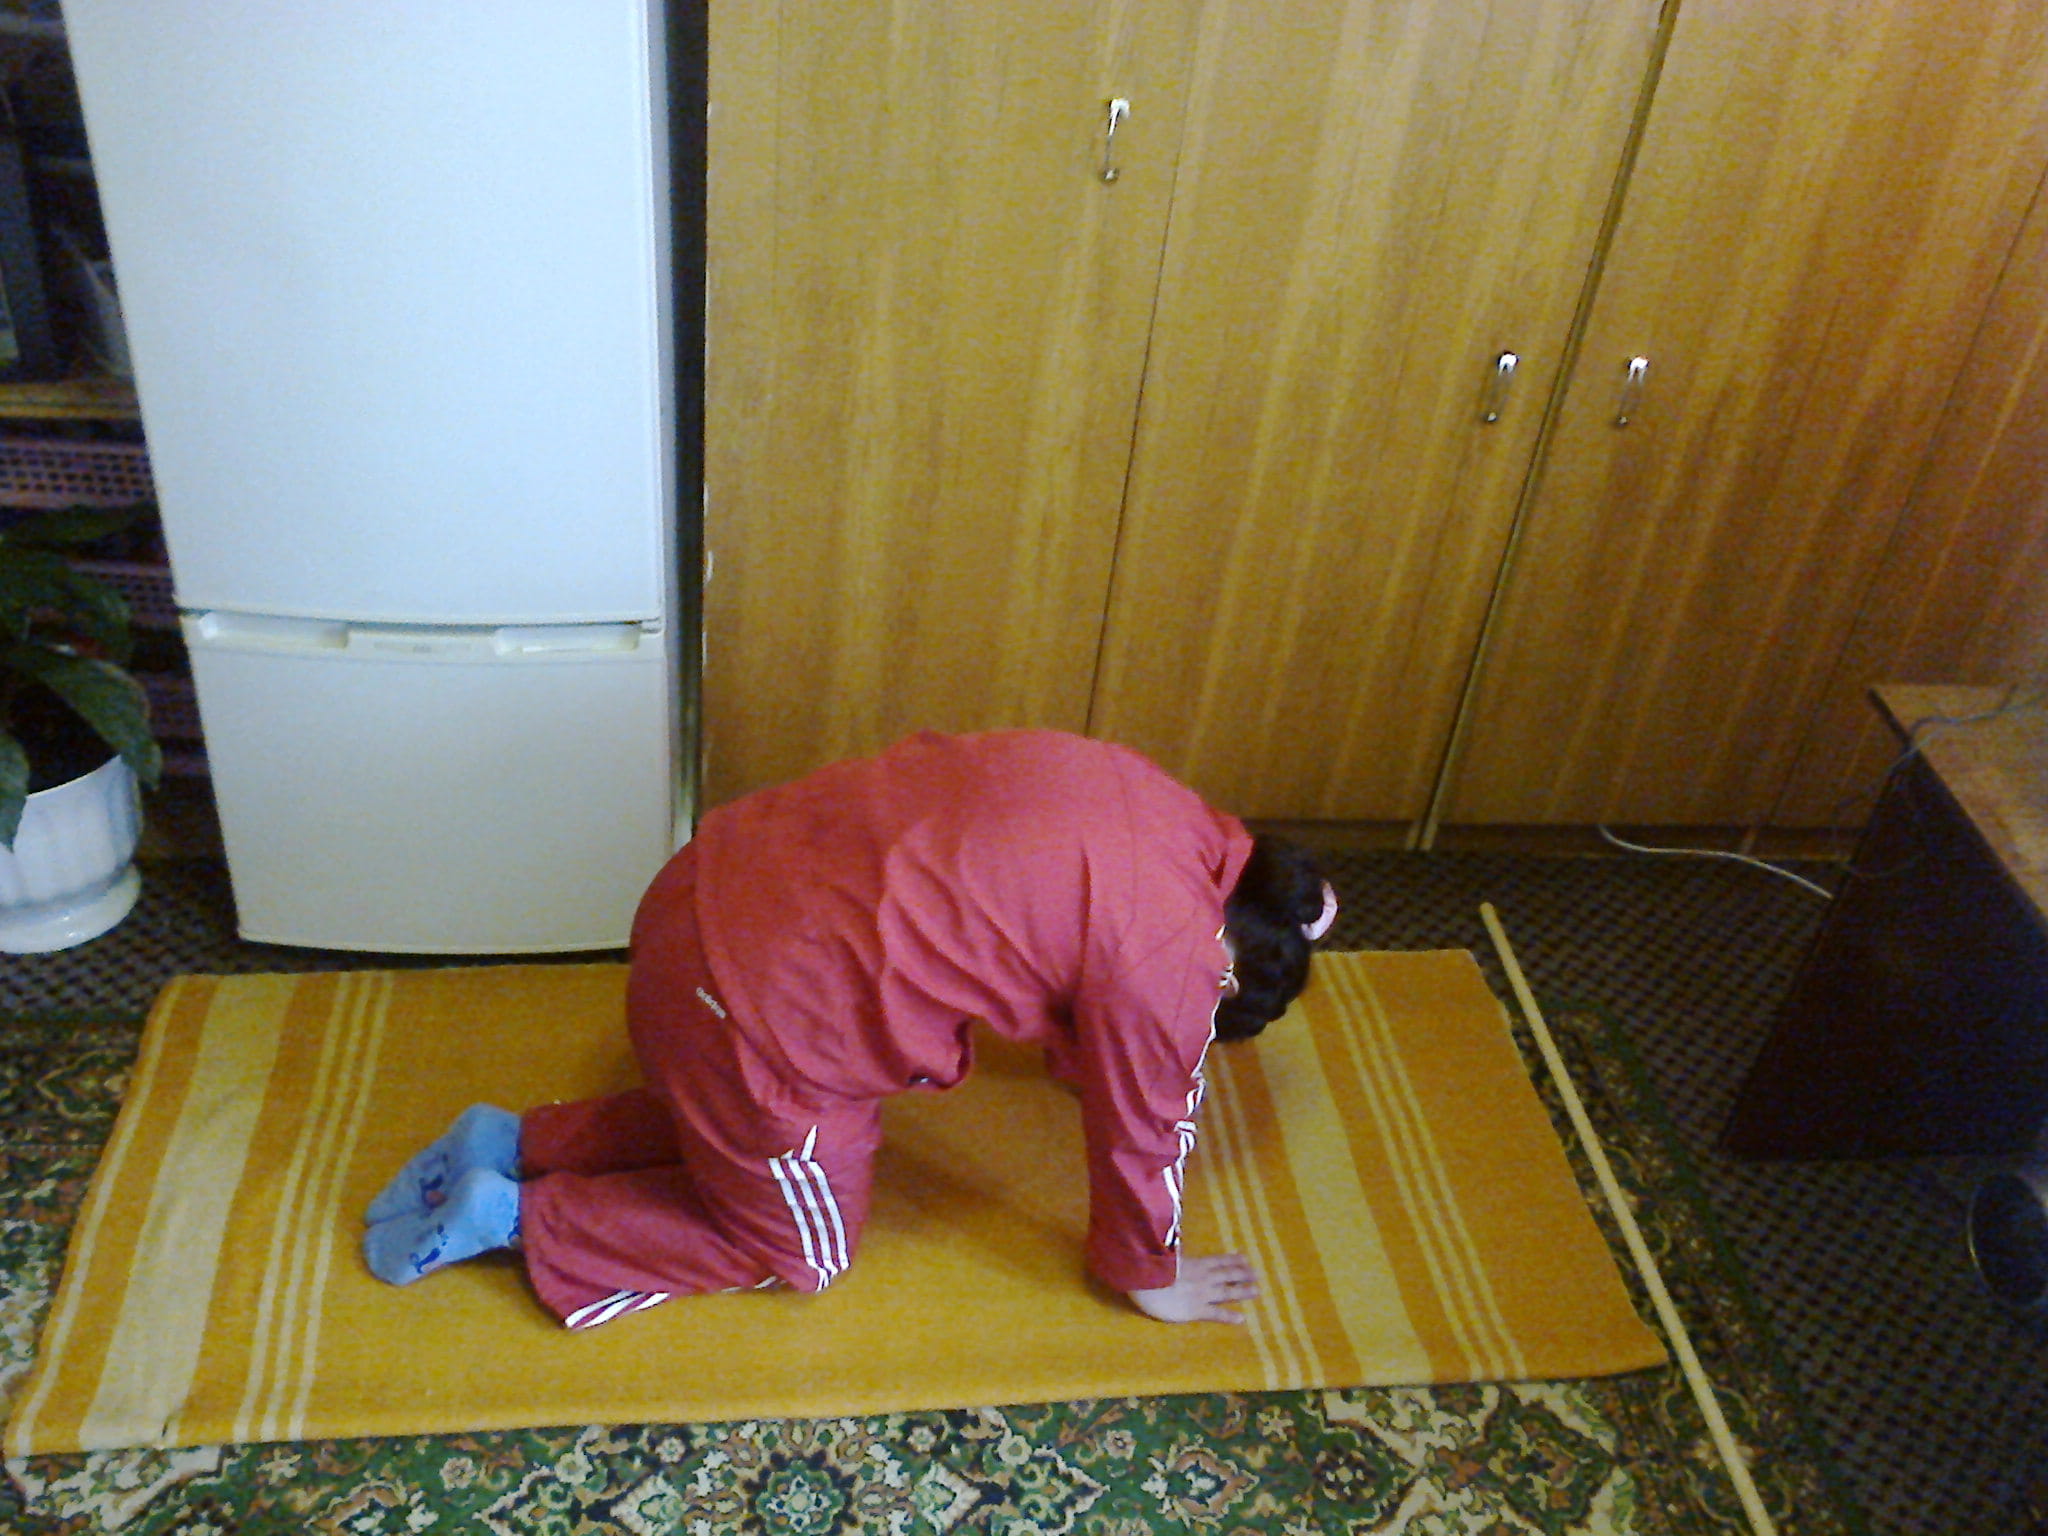
Exercises sitting on the floor and standing on all fours
| Image and title | Brief instructions |
 |
1. Sit with your soles touching each other. Cross your arms with your palms on inner part knees For 5 seconds, push your knees apart, but try to connect them. 2. Press down for 5-7 seconds on one knee, and then for the same amount of time on the other knee. 3. Bend forward for 5 seconds, exhale, deepen the tilt, and freeze for another 5 seconds. Repeat 3 times. |
 |
You need to step your buttocks in 4 directions - forward, backward, left and right. This must be done for quite a long time, for one music track, about 3-5 minutes. It is not forbidden to “help” yourself with your hands. However, you should remember the recommendations of the author of this exercise, Dr. Neumyvakin: 1. Don’t slouch or tilt your head. 2. Do not bend your knees. |
 |
From a kneeling position, extend your left arm and right leg. Look straight down. Don't arch your lower back. Breathe calmly. Freeze for 30 seconds. After a few seconds of rest, repeat the hold with your other arm and leg extended. If there are no problems with the knee joints, then the exercise can be done 2-3 times. |
 |
Do 4-6 cycles consisting of smooth changes in positions: 1. The cat is petting - the back is arched (exhale). 2. The cat is angry - the back is rounded (inhale). 3-4. Having straightened your back and exhaled while holding your breath, “the cat looks at the tail” through the right, and then through left shoulder, trying to reach the shoulder to the hip joint. |
 |
Get on your knees, resting on your palms without bending your elbows. Your arms and hips should be perpendicular to the floor. After inhaling, as you exhale, “pass” one arm under the other, twisting but not rounding your back either in the chest or in the lower back. You need to stand in this position for 10 to 20 seconds. Then rest and repeat the twist in the other direction. |
Important! During gymnastics class did you feel short of breath, very tired, did your heart suddenly pound in your ears or throat? Be sure to pause, during which you do not breathing exercises. They can only make the situation worse. Breathe calmly, not deeply and rhythmically for several minutes. Drink some water.
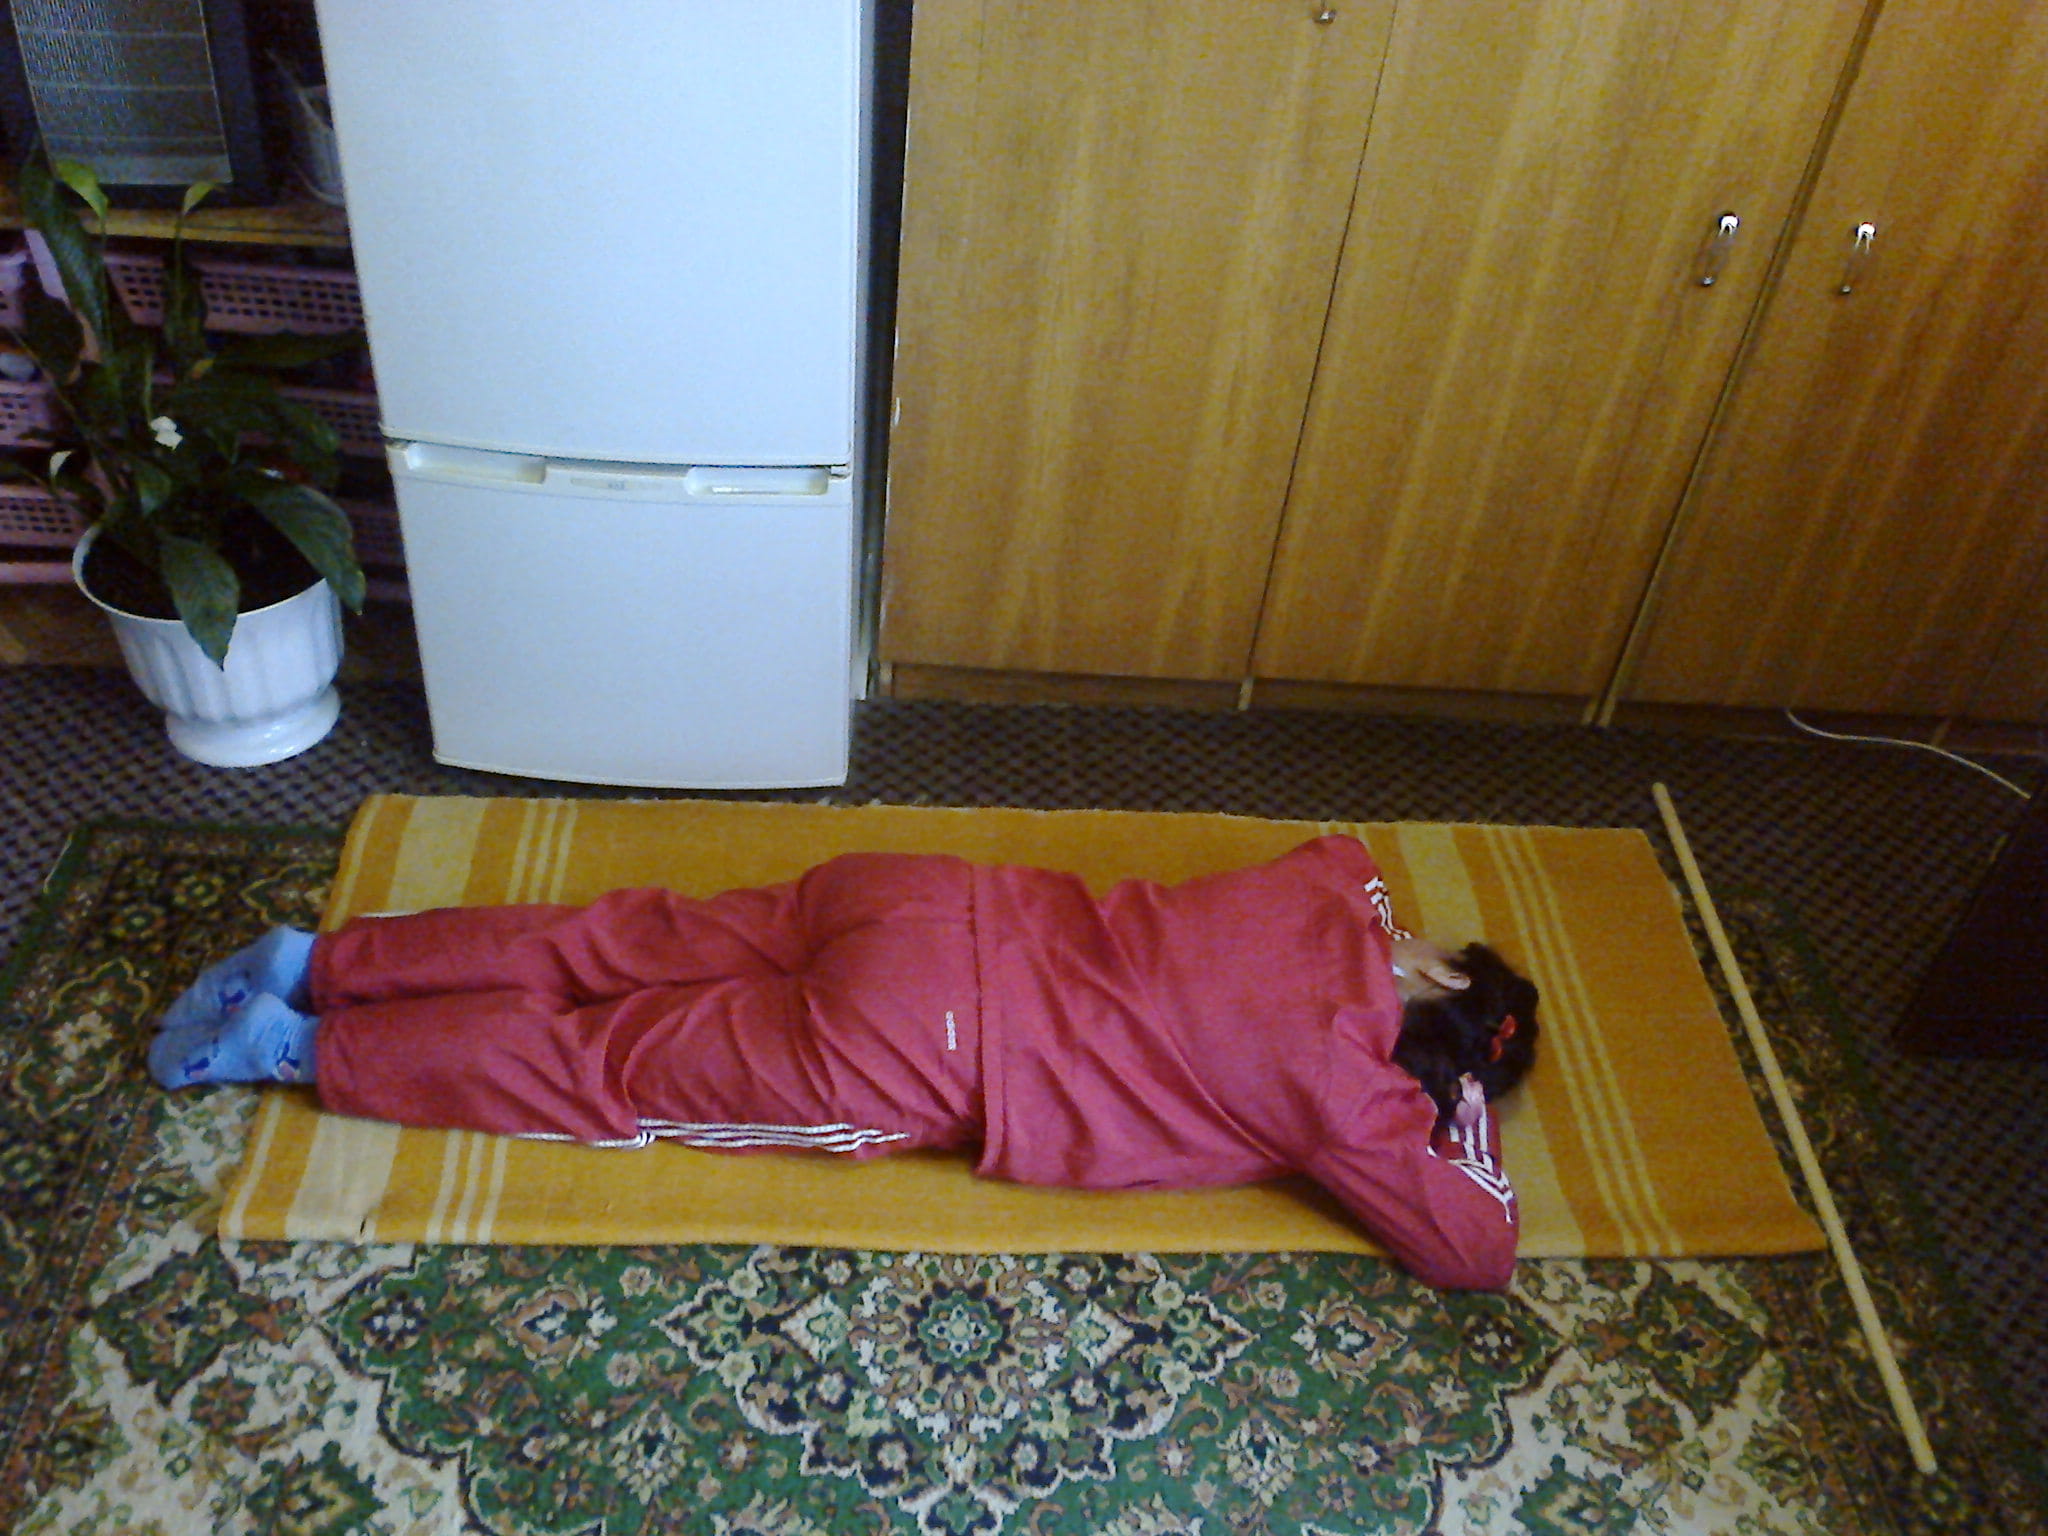
Exercises while lying on your stomach
| Images and title | Brief instructions |
 |
Lie on your stomach. Place the insteps of your feet on the floor with your toes pointed out. Place your palms on the floor close to your shoulder joints. Do 6 push-ups, arching your back without lifting your hips off the floor. When going up, inhale; when going down, exhale. On the 7th time, freeze for 10 seconds, breathe shallowly. Then, as you exhale, slightly increase the force of the deflection, and stay like this for another 10 seconds. If desired, this series (dynamics + statics) can be repeated 2-3 times. |
 |
Lie on your stomach with a rolled towel under your stomach. As you inhale, bend your elbows and knees. To begin with, the movement can be done not simultaneously, but in turn - first bend your arms and then your legs. As you exhale, return to the starting position. Do at least 3-4 frog movements. The maximum number of repetitions is 16. |
 |
While you continue to lie on your stomach on the rolled-up towel, work your shins, keeping your knees together. Try to “pat” your heels on your buttocks. After making 20-30 movements, proceed to the second part of the exercise. Spread your knees and feet wide. Connecting your toes, bend as in the photo, inhaling at this time. Exhaling, return to initial pose. Do the exercise in the other direction. Total 6-12 repetitions. |
 |
1. Take the towel out from under your stomach, place your fingers on the floor, stretch your arms forward, lifting your shoulders off the floor. Don't throw your head back, look straight down. Count to 10. 2. Bend your elbows, bringing your hands to your shoulders, with your palms facing the floor, and count to 10 again. 3. And for another 10 counts, stay with your arms stretched back. Rest and do it all over again. |
 |
Extend your straight arms and legs to the sides. When viewed from above, the body with limbs should resemble a narrow letter “X”. Raise your left arm and right leg. As they lower, extend your right arm and left leg upward. Work at a medium pace. Change the position to the count of “one - and”. Count to 30. Breathe casually and shallowly. |
Side lying exercises
| Image and title | Brief instructions |
 |
1. Lie on your side, as in the photo. Grab your left ankle with your left palm and pull it towards your left buttock. Hold the stretch for 15 seconds. 2. Leaving the grip on your left ankle, bend your right knee, placing your right palm on it. Press them against each other for 10 seconds. Do not hold your breath, breathe randomly and not very deeply. |
 |
Do 20 leg raises (movements indicated by arrows). Work your leg monotonously, like a mint, and don't throw it on the floor. Please note that the toes of both feet should be pulled towards you. Do not do the exercise with the other leg, but move on to the next movement. |
 |
Still lying on your side, bend your knees. Slowly and very carefully, for 3 or 4 counts, lift the knee of the “upper” leg, and then return it to the same speed. knee joint"support" leg. Do not perform the exercise in jerks! Even in a warm state, but in the presence of osteoporosis, hip joint can cause serious injury. Do the pelvic opening movement 6 times and immediately begin the next movements. |
 |
Before starting this series of movements, which also must be done extremely carefully and responsibly, again at an average or slow pace, the legs must be straightened slightly. Raise your leg (1), touch your knee to the floor in front (2), lift your leg again (3), touch your toe to the floor from behind (4). Repeat 4-6 times. Well, now turn on the other side and start doing a series of exercises from the very beginning (see above). |
 |
Bend your legs, point your toes, raise your arms to the ceiling, as in the photo. As you inhale, stretch your arms up, bending at your side, and lifting your lower shoulder off the floor. As you exhale, return the shoulder girdle to its original position. Repeat 6 times, and then do the exercise while lying on the other side. |
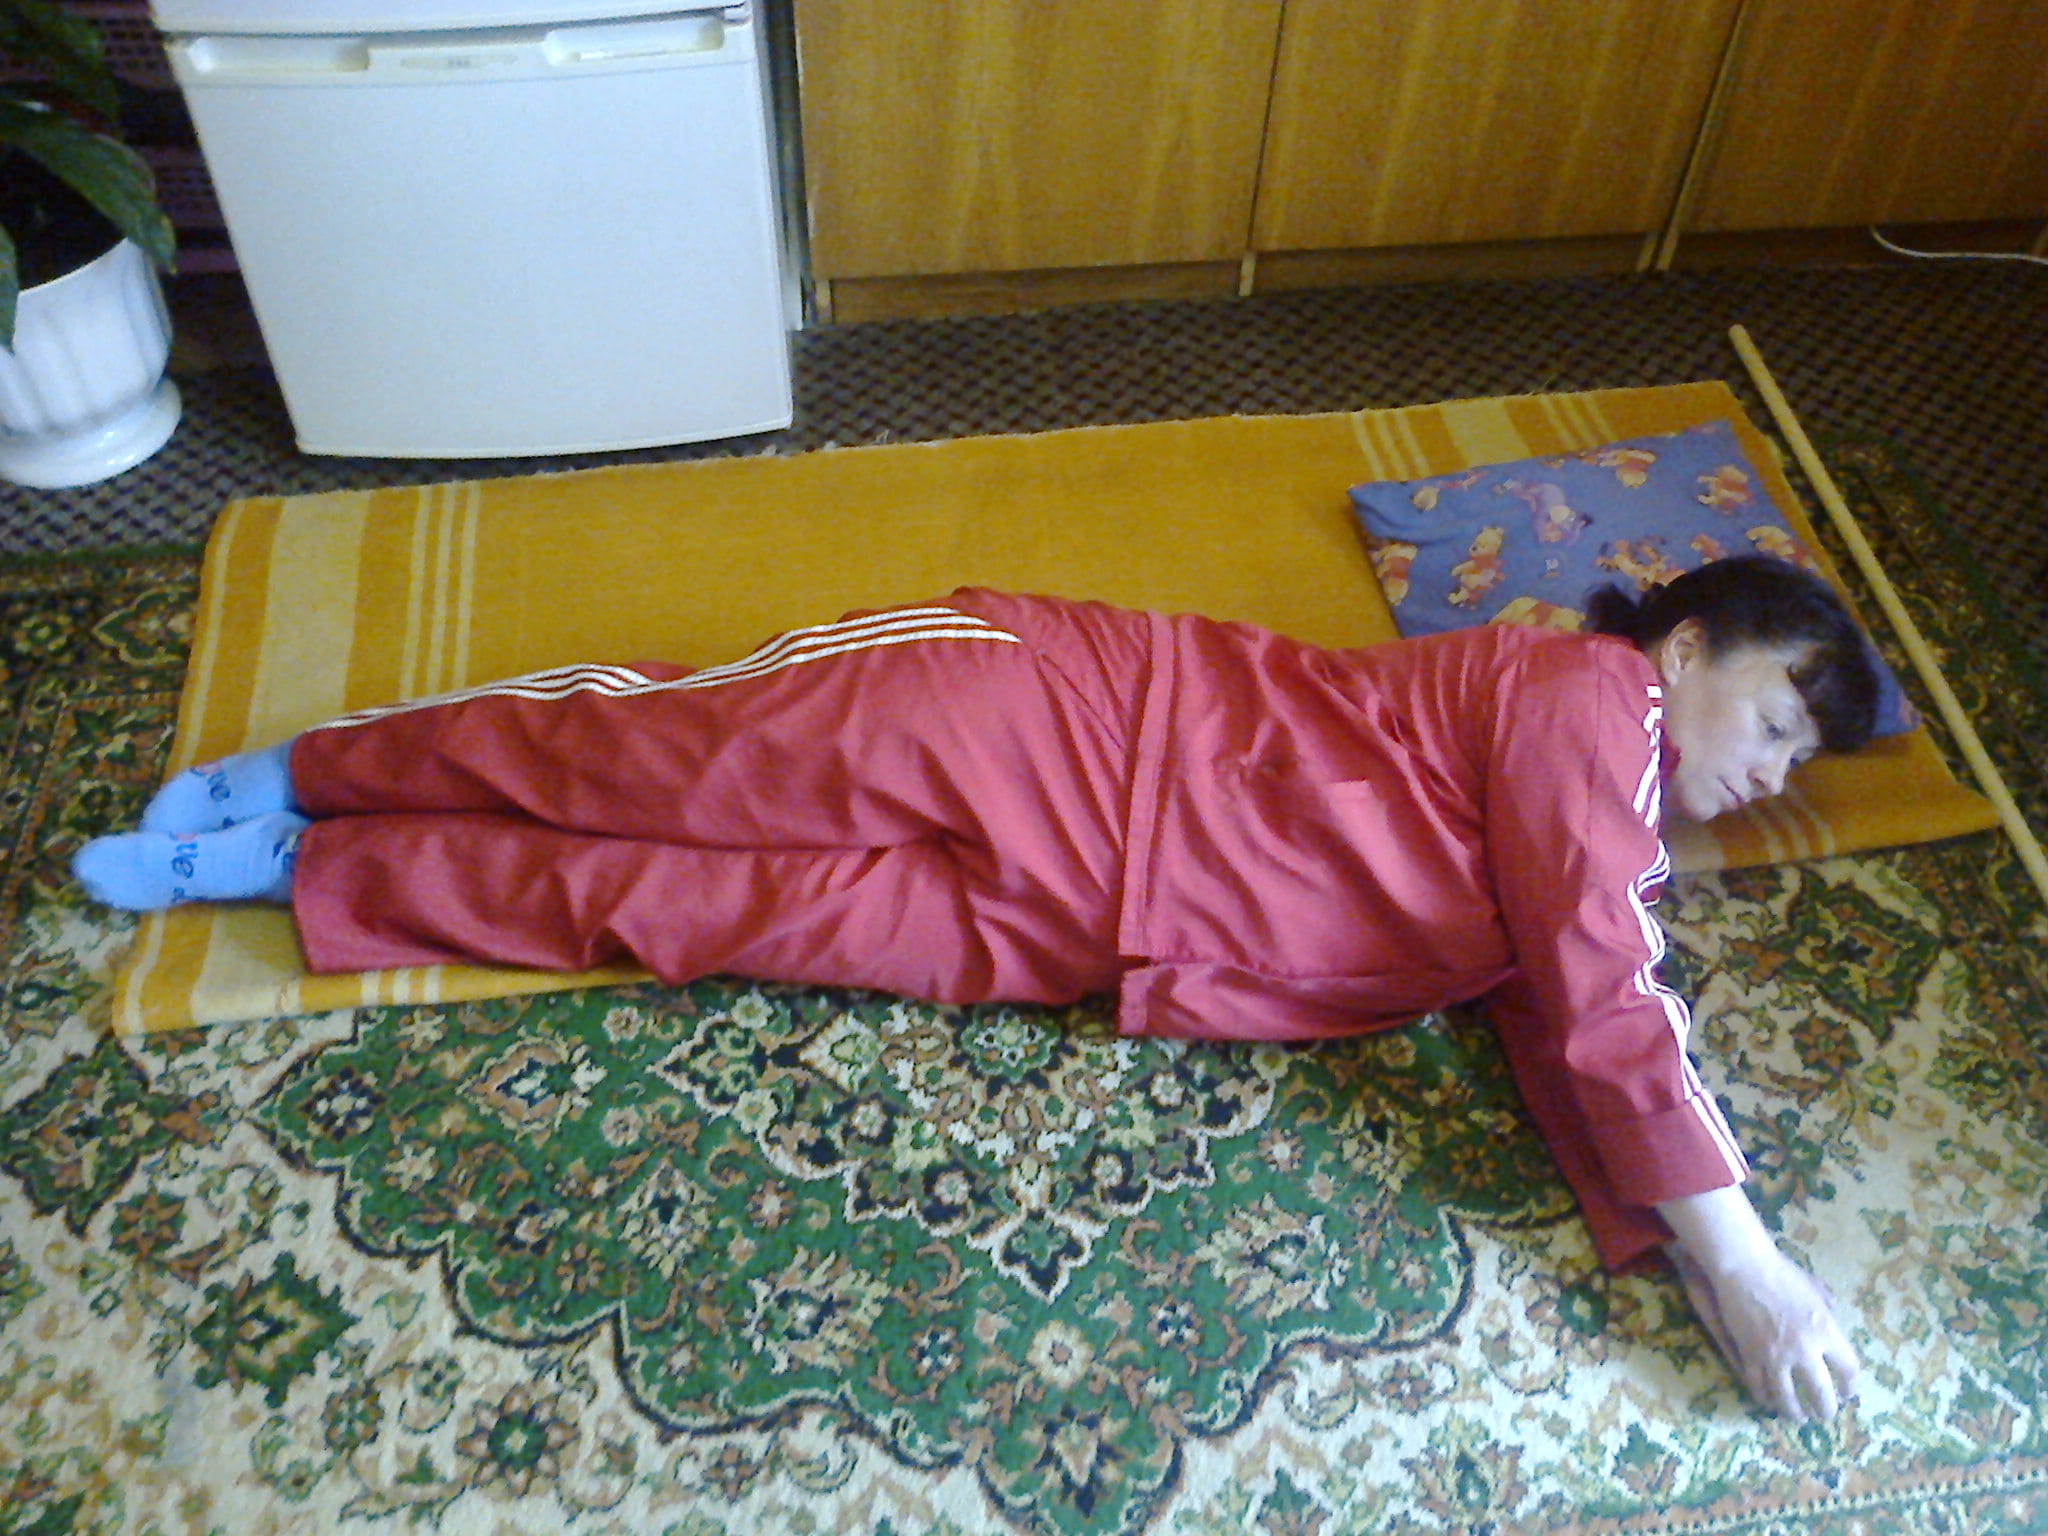
Exercises while lying on your back
| Image and title | Brief instructions |
 |
Starting position: lying on your back, legs bent at the knees, arms with dumbbells extended towards the ceiling. Returning all the time to this position (as you exhale), while inhaling, do: 1 – Raising your arms to the sides. 2 – placing dumbbells behind your head. 3 – bending the arms, forearms vertical. Dosage: 3 sets of 6 series. |
 |
Starting position: lying on your back, head on the floor, arms along the body, legs bent at the knees at an angle of 90 degrees, hips perpendicular to the floor. Simultaneously lift your head and pull your fingers and toes towards you. The angle of flexion of the ankle and wrist joints should be maximum, but the chin should not touch the chest. Dosage: 2-3 times for 15 seconds. |
 |
Before stretching the groin, as in the photo, doing this 3 times for 5-7 seconds, perform Kegel contractions. Lie flat, legs straight, arms along your body. Quickly, 10-15 times in a row, contract the muscles of the perineum, which are located around the sphincter that stops urination. Rest for a few seconds and repeat the contractions 1 or 2 more times. Be careful not to tense your buttocks. |
 |
1. Pull your left foot toward you and place your right heel on your left toes. Turn your feet to the right and then to the left, trying to touch the floor with your right toe. After 6-8 turns, change the position of your feet and repeat. 2. Hold the position as in the photo for 30 seconds for each leg. 3. Bend one leg and twist your lower back, placing your knee on the floor. You also need to lie in such positions for 30 seconds. |
 |
Starting position: lying on your back, arms along your body, legs spread shoulder-width apart and bent at the knees, soles standing parallel and as close to the buttocks as possible. Do 10 lifts of the pelvis up, and on the 11th time, stay in the “bridge” for 10 seconds. After giving the muscles a rest, repeat the exercise (dynamics + statics) again. |
 |
1. Having stretched out, maintain the stretched position for 5 seconds. 2-3. Now stretch at the same time, 5 seconds for your left leg and right arm, and then 5 seconds for your right leg and left arm. 4. Perform the final 5-second stretch by pulling your stomach in. |
Finish the set of exercises with 2-3 minutes of quiet lying on your back, arms and legs spread out to the sides. If necessary, place a rolled-up towel under your lower back.
Aerobic exercise
Aerobic exercise is the performance of movement or physical exercise of low and/or moderate intensity. They help strengthen the functioning of the vascular system and myocardium, maintain normal weight body or weight loss, improve well-being.

One of best views aerobic exercise in old age - water aerobics and dosed swimming, as well as work on cardio equipment, are inaccessible to many. However, walking is accessible to almost everyone, but in order to benefit from measured walking maximum benefit It is better to practice Nordic walking with poles.
Their price is not too high, and you can also purchase them online. You can learn how to walk correctly and correctly increase the load when exercising with such equipment from the article on our website “ Nordic walking with poles: walking technique for the elderly, benefits and contraindications.”
By the way, creative people get bored walking, swimming or pedaling for a long time, even if these cyclic loads are performed to music. For such pensioners, and especially for those who love and know how to dance, it is recommended to try Chinese health gymnastics.
Are such complexly coordinated low-intensity physical exercises suitable for you to maintain the vestibular apparatus and cardiovascular system? Try it! Here is a short video of a tai chi complex, compiled specifically for beginners. After a short introduction, the instructor clearly explains and demonstrates all the movements of the “dancing tree”.
Evening cool down
The daily plan for improving the health of older women with the help of physical exercise must include the so-called evening cool-down - a short set of several light physical exercises. Usually these are stretching movements and corrective and “calming” yoga asanas, which are performed before taking an evening hygienic shower, shortly before bed. You can also do a cool-down after a shower, because exercise stress will be minimal.
Try doing a cool-down before going to bed, and you will feel the results quite quickly:
- the transition from wakefulness to sleep will accelerate;
- joints will become less stiff during sleep;
- the strength and number of night cramps will decrease or they will disappear completely;
- the number of awakenings will decrease;
- they will stop having “bad” dreams;
- after waking up, the sensations from a night's rest will be more complete.
For example, we suggest doing this in the evenings: simple exercises that the instructions for their implementation fit into one sentence.
Photo gallery “Evening cool-down for older women”:
And in conclusion, we suggest watching another video with a set of exercises for older women. Perhaps “pure” yoga is the type of gymnastics that you will love and do regularly and with pleasure.
In contact with


