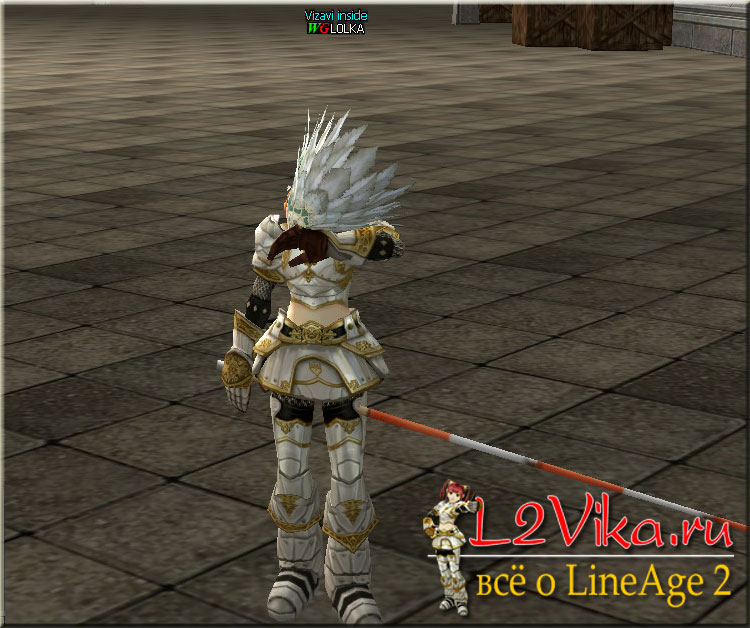
Strong fishing rod lineage 2. Update Helios, Lord of Bifrost. That's all, happy fishing
Fishing rules - Fishing skills - Fishing shotsI’ll say right away that I never had the perseverance (stability) to stand by the river for hours and fish, although a couple of times Volodya AKA pulled me out to big fishing, where we competed to see who could catch the most fish, and only then did I find out that he was a bastard fishing on a boat. But, nevertheless, since fishing was added to the game, some are interested in it, and some even get stuck on it for hours.
Why is fishing necessary? The main thing is to obtain Proof of Catching a Fish items, which are needed to expand your inventory, increase slots for trading, etc. We, as crafters, primarily need them to increase the slots in the crafting book, since with the standard 50 slots you won’t get far.
Well, an additional prize in fishing will be the crafting of all kinds of accessories, some of them are quite rare. Yes, it also involves selling white fish to all sorts of incompetents, which is necessary for passing some third profs. Well, there are also a bunch of fish recipes with a nasty green color, which are sold in all clan halls, with which you can craft items sold by Mammon and Nosy, including Mammon paints +4 -4.
In essence, if we discard the ritual of throwing a fishing rod into the sea-ocean, fish are the same mobs, and with the help of a special weapon (fishing rod) and fish nipples you beat these mobs. As soon as the fish’s life bar reaches zero, the fish is considered caught and will be in your inventory. You will need to gut it (double click on the fish), and depending on the color of the fish and its name you will receive some kind of drop. Well, or you won’t get it, but you will hear a characteristic “zilch”, which means that there was nothing in the fish. The most annoying thing is that there can be a lot of such fluff; I once had 12 failures in a row. These received items are either exchanged by the men for fish tickets or used to craft accessories or items.

Let's start for those who don't know anything about fishing at all. In order to fish, you need water (any place where, if you go into the water, a red underwater breath bar appears), a fishing rod, bait, and optional fishing nipples.
All this can be purchased from fat men with the inscription Fishing Guild Member, standing in every city, usually in a grossery shop, but sometimes in locations (one of these stands in the central clearing in).

Let’s look at what the man offers us, item by menu item:
1. Chat about fishing. Doesn't oblige you to anything.
2. Learn to fish. At this point, not only fishing skills are available for learning, but also expanding your inventory, etc.

Basic fishing skills:
Fishing is the main fishing skill. Active. With its help, you throw a fishing rod into the river (not the fishing rod itself, although that would also be cool when a desperate fisherman throws a hated production tool into the sea) or pull it out of the water when it’s clear that the fish aren’t biting. There is only one level of study, that is, the first. Doesn't affect anything, only the beginning and end of the fishing process.
Fishing Expertise - passive, 27 levels, the color of fish you will catch depends on the skill level.
Here it is necessary to mention the colors of the fish. The easiest prey to catch is at low levels, and these are green colored fish. Naturally, there is no drop from it. The coolest fish are white and black, caught on levels from 21 to 27, the best drop.
Reeling - hitting the fish while it is moving (when the fish's life bar is growing). Active, 27 study levels, the strength of the blow depends on the level of the skill.
Pumping - hitting the fish when it is standing still (when the fish's life bar is not moving). Active, 27 study levels, the strength of the blow depends on the level of the skill.
Here you may have a crazy thought that it would be good to learn the first level of examination, and the levels of attacks to the very last (27th), and smash small fish with one hit. So you drive this thought away from yourself, straight with kicks. And all because if the level of experience is three or more below the level of active strikes, a fine will be charged for each difference in level, and the greater the difference, the greater the fine, and if your expertise is at 1st level, and the skill level is 27, then you will simply stroke the fish without causing any damage to it, which will be reported to you every time in the fishing screen.
3. We’ve sorted out the skills, now the next menu item is where you are invited to buy fish products.

Everything is simple here.
Fishing rods, like weapons, vary by grade - from no grade to Y grade. The higher the grade, the more damage you cause to the fish.
Baby Duck Rod - but grade, cost 40k
Albatross Rod - D grade, cost 135k
Pelican Rod - C grade, cost 540k
KingFisher Rod - B grade, cost 1.62kk
Cygnus Pole - A grade, cost 5.4kk
Triton Pole - S grade, cost 13.5kk
Baits - I won’t list them all, they are divided by colors and names. The differences in colors in one subgroup are minimal, that is, Purple Colored Lure and Yellow Colored Lure will differ in the minimal chance of catching something there, so you shouldn’t pay much attention to the colors.
For bait Colored Lure - For Beginners fish should be caught for beginners, they have less life and more time to catch, but the chances of a drop are reduced, and the amount of drop is reduced.
Colored Lure- the main bait for catching ordinary fish, standard drop chances and number of fish items.
Luminous Lure- luminous bait designed for night fishing, only with the help of this bait can you catch fish with the words Upper Grade added to their name, and only this fish in the drop has colored scales and keys for crafting rare accessories.
Prize-Winning Fishing Lure- some kind of prize bait, but it works crookedly everywhere, on some servers it only catches chests, on some I didn’t notice any differences at all. We will talk about all the fishing schools below.
And since we’re talking about chests, I’ll add about what is generally caught. All fish are divided into regular, for beginners, and upper grade (night), plus you can catch chests - each color is divided into two types, the amount of drop in which is the same, but from big chests there is a chance to get more of it. Only Fish Oil items of various types and directly fish proofs drop from the chests.
You can also buy a fishing manual from fat people who have been fattened up on fresh fish, which you don’t really need, as well as all sorts of Fisherman Potion bottles of different colors. They are needed to lower your fishing level. That is: you have learned the maximum levels of fishing skills, catch yourself white and black fish, and you urgently need green fish scales to craft some kind of hat. Oops, you won't be able to catch green fish unless a squirrel visits you. In this case, you buy a green pousheen, drink it - and here they are, joyful green glitches - you immediately start catching green fish. To return to normal, you need, no, not to get sober, but to drink a black bottle of Fishing Potion. I’ll say right away that in all my time I haven’t seen a single server where these bottles work. However, you might get lucky.
4. The next menu item will be the sale of unnecessary items, which does not interest us at all. But then comes point 5, in which you can exchange objects extracted from fish for proofs.

If you are not interested in crafting accessories, you can exchange all available items for fish tickets, but if you want to craft, change what is not needed for crafting, mainly it will be fish oil (wow, what disgusting), there you can also craft it from a simple to elite, for which they give more tickets.
The last menu item will be the “quests” tab. We need it, that is, we are only interested in one quest there - for fish nipples. It's called: Quest for Fishing Shots. You need to hit mobs on it, from which Sweet Fluid items drop, which change to fish nipples. The number and chance of dropping quest items depend on the level of the mobs and the crookedness of the admins, so don’t be surprised if only one item drops from a 70+ mob. Alarm!! - almost always the drop of items for this quest will interfere with the drop of items for other quests, so before completing other important quests in which the mobs coincide with the quest for nipples, it is advisable to first exchange all the vibes, cancel the quest for nipples, and only then take another quest.
As soon as you knock out at least one fluid, Fisherman will have one more item in the quest - exchange the fluids for nipples:

The guy lists in detail all the locations and all the mobs that drop fluids.
That's it, now about the fishing process itself. We buy a fishing rod according to the grade, a certain amount of bait (let it be ordinary bait to start mastering), study the phishing skill, the first level of the expertise skill, the third level of the reeling and pumping skills and move to the river. We put the skills on the panel, if there are any, we add fish nipples there. Click on the Fishing skill, while casting a fishing rod. A small window appears, where you can see a float swinging on the waves. Yes, the bait itself does not fit into the slot along with the fishing rod; it must be placed there by clicking.

If the fish doesn’t bite, you purr something unintelligible to yourself for a while, then cry, and the fishing rod returns to its original position. You can throw it again. If the fish bites, then they will write to you in the fish window: the fish is biting (this is for the especially gifted). A blue bar will appear, and above it the number of seconds remaining until the fish falls off the hook.

At this moment, those two active skills responsible for catching fish come into play. We put our fingers on the buttons responsible for the skills, for me these are F1 and F3, between them there are fish nipples on F2. The nipples are not automatic, that is, after each blow they must be turned on again. If the fish's life bar is moving, click on Reeling, if it stands still, then click on Pumping. When you hit the right key, the life of the fish decreases, when you hit the wrong key, it increases. Everything would be fine, but skills have a cooldown time, and poking at them all the time won’t do anything, so we turn on the sound in the game and listen carefully to the click of the skill’s rollback. As soon as you drive the blue bar down to zero, the fish is caught, screams, screams, panties full of joy.

If the time is up, then the fishing was unsuccessful - hysterics and snot smeared over the face.
It’s not for nothing that I advise you to start with the first levels of fishing, so that you bring all movements to automaticity, after which you can raise the level to the one you need. And after that you can move on to night fishing.
Night fishing (I’m now writing about how this should work, but it’s not a fact that it will be exactly like this on your server) differs from daytime fishing in that it should only take place during night game time, the bait should only be luminous. When fishing at night, the fish are much stronger than usual, and the time to catch them is half as long. At the same time, the fish becomes completely crazy, and when it moves, you need to suppress it with the skill not Reeling, but Pumping, and when stopping, not Pumping, but Reeling, that is, the opposite is true. When fishing at night, I usually just swap the skills on the panel and don’t look there anymore. That’s why it was necessary to bring all movements to automaticity.
Regarding the fishing settings on different servers: whatever comes to mind, everything is crooked everywhere. I have already written about paints that reduce the level of fishing. On some servers, night fishing is not implemented at all, somewhere it is, but it does not work at night, but how will it turn out, on one server they told me that there is night fishing, but it turns on only after you cast a fishing rod for at least 60 times. Somewhere in the drop from night fish there are no colored scales, somewhere there are them, but there are no keys for crafting rare accessories. Therefore, before you start fishing on a new server, it is advisable to ask the players exactly how fishing works here. Yes, there are still servers where night fishing works, but the skills for killing fish do not change. This is of course easier for the players, but much less interesting.
Here's something else I forgot to mention - sometimes instead of fish you can catch sea monsters that will immediately attack you. If you nail them, they may have all sorts of different baits and nipples in the drop.
And sometimes you can catch these funny fish:

Well, basically, everything is about fishing for now; I’ll tell you about crafting using fishing items a little later. I'm telling you.
Preparing for fishing
Fishing rods
First of all, you will need a fishing rod. They differ in grade and price, in addition, depending on the grade, it is necessary to use various types fishing shots (charges for fishing). The difference between the fishing rods is the damage they cause to the fish when fishing.
| Name | Grade | Price | |
|---|---|---|---|
| Baby Duck Rod | No Grade | 36,000 Adena | |
| Albatross Rod | D Grade | 1,20,000 Adena | |
| Pelican Rod | C Grade | 4,80,000 Adena | |
| KingFisher Rod | B Grade | 1 4 40 000 Adena | |
| Cygnus Pole | A Grade | 4 8 00 000 Adena | |
| Triton Pole | S Grade | 1 2 0 00 000 Adena |
Lures (bait)
Lures (bait) vary in color and are Yellow, Green and Purple.
There are also 3 baits for beginners (For Beginners). They are special because they show you which skill to use at any given moment when you fish with them. The downside is that you can only catch low quality fish. Be that as it may, it is preferable to use them if you are fishing for the first time. Buy 20 pieces and try.
Any type of bait can be used with any grade of fishing rod.
| Name | Price | |
|---|---|---|
| Green Colored Lure - For Beginners | 60 Adena | |
| Purple Colored Lure - For Beginners | 84 Adena | |
| Yellow Colored Lure - For Beginners | 72 Adena | |
| Green Colored Lure | 144 Adena | |
| Purple Colored Lure | 216 Adena | |
| Yellow Colored Lure | 180 Adena | |
| Green Luminous Lure | 144 Adena | |
| Purple Luminous Lure | 216 Adena | |
| Yellow Luminous Lure | 180 Adena | |
| Prize-Winning Fishing Lure | 288 Adena | |
| Prize-Winning Night Fishing Lure | 288 Adena | |
| Prize-Winning Novice Fishing Lure | 120 Adena |
Baits, or rather their division by color, are designed to help you catch a specific type of fish. According to their description, using Green you will catch more Nimble (agile) fish, using Yellow - more Ugly (ugly) fish, and using Purple - more Fat (well-fed).
Fishing Shots
The principle of use is the same as for charges for conventional weapons: using a fish soulshot doubles the damage done to the fish. Be careful: when using a skill that does not correspond at this moment, fish soulshot increases fish health, in the amount of damage that you would cause if you used the “correct” skill. In general, it is recommended to use fish charges only for difficult-to-catch fish.
Fish soulshots cannot be set to auto-use, like soulshots for weapons.
Fishing soulshots of the appropriate level are required for a fishing rod of each grade.
You can get fish soulshots through the quest Quest for Fishing Shots.
Abilities (skills)
Naturally, in order to fish, you need skills. They do not require skill points (SP), but cost money. They can be purchased from the Fishing Guide NPC in Grosery (magical stores). To gain skills, you need to choose "Please teach me to fish" in the conversation menu with NPCs.
To fish, you need to have four skills: Fishing, Pumping, Reeling And Fishing Expertise.
Fishing- active skill, has only 1 level.
Fishing Expertise
Fishing Expertise determines the color of the fish and the level of the monster that you can catch:
- 1-3: Green Fish (Small, Normal, Big)
- 4-6: Jade Fish (Small, Normal, Big)
- 7-9: Blue Fish (Small, Normal, Big)
- 10-12: Yellow Fish (Small, Normal, Big)
- 13-15: Orange Fish (Small, Normal, Big)
- 16-18: Purple Fish (Small, Normal, Big)
- 19-21: Red Fish (Small, Normal, Big)
- 22-24: White Fish (Small, Normal, Big)
- 25-27: Black Fish (Small, Normal, Big)
In general, about 50% of the fish you catch will be at the Expertise level you've learned, 45% will be at a level below, and about 5% will be at a level above.
Bottles that reduce Fishing Expertise level
Sometimes you need to lower the level of your own fishing skills, for example, to catch lower-level fishing materials. To do this, you can buy special bottles from Fishing Guide Member that reduce your Fishing Expertise level.
| Name | Price | Description | |
|---|---|---|---|
| Fisherman's Potion - Green | 6,000 Adena | Sets level 2 Fishing Expertise (Green Fish). | |
| Fisherman's Potion - Jade | 6,000 Adena | Sets level 5 Fishing Expertise (Jade Fish). | |
| Fisherman's Potion - Blue | 6,000 Adena | Sets level 8 Fishing Expertise (Blue Fish). | |
| Fisherman's Potion - Yellow | 6,000 Adena | Sets level 11 Fishing Expertise (Yellow Fish). | |
| Fisherman's Potion - Orange | 6,000 Adena | Sets level 14 Fishing Expertise (Orange Fish). | |
| Fisherman's Potion - Purple | 6,000 Adena | Sets level 17 Fishing Expertise (Purple Fish). | |
| Fisherman's Potion - Red | 6,000 Adena | Sets level 20 Fishing Expertise (Red Fish). | |
| Fisherman's Potion - White | 6,000 Adena | Sets level 23 Fishing Expertise (White Fish). | |
| Fishing Potion | 6,000 Adena | Returns the user's Fishing Expertise level, overriding Fisherman's Potion. |
Pumping and Reeling
Pumping And Reeling designed to cause damage to fish during the process of catching it.
The higher the level of each of them, the higher the damage done to the fish, and as the level increases, the cooldown time of the skill also decreases. You must remember that if the difference between the levels of Pumping/Reeling and the level of Fishing Expertise is more than 2 levels, you receive a fishing penalty: a reduction in damage from each skill by 5% for each level of difference.
Skills acquired through fishing
By fishing, you can acquire new skills. To do this, you need to sell what you catch to an NPC fisherman, the same one from whom you learn fishing skills. To gain new skills, you will need Proof of Catching a Fish (fisherman's stamps), you will get them by catching or trading for general crafting resources.
Expand Common Craft- expands the general crafting recipe book by 6 cells for each level, maximum - 48 cells.
Expand Storage- increases the capacity of your personal bank by 6 cells per level, maximum - 48 new cells.
Expand Inventory- expands the backpack capacity by 6 cells per level, maximum - 48 cells.
Expand Dwarven Craft(only for gnomes, mainly Warsmith; the skill itself is learned from ordinary NPC trainers, not from a fisherman) - expands the capacity of the gnome's recipe book by 6 cells per level, maximum - 48 cells.
Expand Trade- expands the number of slots for buying and selling in a personal store by 1 per level, the maximum increase is 3 cells.
Fishing
Fishing is very easy. If you are a beginner, it is recommended to use the For Beginners bait, as they show you on a special screen which skill to use at any given moment. Using such baits, learning to fish will not be difficult.
In order to start fishing, you need to find a deep place. A deep place is any puddle, while in which you have a breathing scale above your head.
Place the Fishing, Pumping and Reeling skills on the hotkey panel; if you are doing a quest for fish soulshots, place them on the panel as well. In addition, you will need a slot with weapons and basic attack skills, since remember that you can catch the monster.
Stand on the shoreline facing the water. Use Fishing- your character will start fishing. A new window will appear on the screen where you will see your float. All you have to do now is catch the fish using Pumping and Reeling.
There are several ways to determine which skill to use at any given time. The most successful is monitoring the fish’s health bar:
- Pumping;
- Reeling.
If you choose the right skill, your health bar will decrease by the amount of damage you deal. If the skill is chosen incorrectly, then health will increase by this number of points.
If you reduce the fish's health points to 0 before the allotted time (30 seconds) ends, you have caught the fish.
Night fishing
Night fishing is available at night from 0:00 to 6:00 game time (game time can be found by typing the command /time or on the world map).
To catch better fish during night fishing you will need Luminous/Night bait.
However, this fish is more cunning than usual. When the life bar of a fish turns red, it means that the fish is being cunning. In this case, the action of the Pumping and Reeling skills has the opposite effect on the fish:
- if the HP points bar stands still, use it Reeling;
- if the HP point bar begins to increase, that is, the fish is restored - Pumping.
Gutting fish
Having caught enough fish, you can gut it (right-click). When gutted, there is a 50% chance that you won't get anything out of it. Most of all you will have general crafting resources, which can be used in general crafting or can be exchanged for Proof of Catching a Fish(fish tickets) from the NPC fisherman. Keep in mind that there is a great opportunity to make high-level fish resources. For example, out of 4 Fish Oil(worth 4 Proof of Catching a Fish) can be done Greater Fish Oil(costs 5 Proof of Catching a Fish).
You can catch a lot of interesting things in the waters of the world of Aden. Take a fishing rod and fish. How? This knowledge will help you with this.
Basics
To start fishing you need to buy fishing rod (Fishing Pole) And bait (Bait/Lure). Find a fisherman (member of the Fishermen's Guild) with a fishing rod in his hand in any city. Fishermen's Guild (Fishing Guild) will gladly accept you into its ranks. Fishing rods, like weapons and armor, are divided into classes ( No Grade, D, C, B, A, S), and the better the class of the fishing rod, the stronger the fish you can catch. If your character puts on a fishing rod that is not of the class, then a penalty will be imposed on the chance of catching fish, and you will catch monsters much more often.
First of all, you need to approach the fisherman and learn the skills: skill Fishing will allow you to use a fishing rod (cast a fishing rod); skill Pumping and skill Reeling will allow you to fish; skill determines your fishing skills.
Skill Fishing Expertise determines your fishing skill level and what kind of fish you can catch. Care must be taken to ensure that skills Pumping And Reeling weren't more than to 2 levels above or below skill level Fishing Expertise, otherwise it will be more difficult to catch, there will be a certain penalty for the “damage” caused to the fish during the fishing process. It's better to do all three skills Fishing Expertise, Pumping And Reeling one level.
Every week there is a fishing tournament in which you can win quite a lot of adena. If you fish a lot and successfully, go up to the fisherman and see if you are on the list of winners. If so, get a reward.
The caught fish can be sold to a store or market, or cut up by double-clicking the mouse. After cutting you get some parts and items that are needed to create jewelry, pirate headbands, monocles, drinks and potions, tattoo inks, other items and to exchange with the fisherman for Proof of Catching a Fish. Evidence is required to acquire some additional skills and capabilities. For example, to increase inventory volume.
Choosing a fishing spot
You can fish almost anywhere where there is a body of water. Face the body of water and use the skill Fishing. If you were able to cast a fishing rod, then you can fish in this place.
Found in different bodies of water different types fish. You will have to learn to determine the place where the right fish is caught.
You shouldn’t fish in one place for a long time, otherwise the fish will learn to avoid the bait and stop biting. If the bite seems to be getting worse, move to another location.
Baits
The Angling Guild sells three main types bait (Lure): green, purple And yellow. There is also an improved and more expensive bait (Prize-Winning), which increases the chance of catching a monster. Buy some of all types of bait.
Different fish in different bodies of water bite on different baits. Determine for yourself which bait is best to catch in the body of water you have chosen. It is believed that green bait is used to catch fast (Nimble) fish caught with purple bait fat fish caught with yellow bait ugly (Ugly) fish.
There are baits of every type regular (Colored Lure), for night fishing (Luminous Lure) And for beginners (For Beginners).
Baits for night fishing (Luminous Lure) can only be used at night from 00:00 to 6:00 game time. Open the map, in the upper left corner the game time is written, next to which there is a sun or moon icon. This will tell you when to use night bait. You can also check the current time using the command “ /time».
When using bait for beginners (For Beginners) You will be shown when to use which fishing skill. Fish caught with beginner bait do not count toward the tournament. Beginner baits can only be used for low level fish.
Fishing process
Take a fishing rod to right hand, bait to the left. After you cast a fishing rod using the skill Fishing It will take some time until the fish finds and swallows the bait. The higher the skill level Fishing Expertise, the faster the fish bites.
A fish that has swallowed bait behaves differently. Some try to get off the hook, while others offer no resistance. After the bite, you will see a strip in front of your eyes illustrating the fishing process. Once you reduce it, the fish will be pulled out of the water. If the stripe is large, the fish will fall off the hook and swim away. You are given a certain time for all actions, after which the fish comes off the hook.
If the fish resists, you need to use skill Reeling unwind the reel until the fish gets tired and stops resisting. Then using the skill Pumping you have to get her out of the water. If the fish resists, the strip slowly grows, and when the fish is tired, the strip remains the same length. Proper Use skills will reduce the bar and bring your victory closer. Incorrect use, on the contrary, will allow the fish to fall off the hook faster.
Catching valuable fish
When improving your fishing skills Fishing Expertise there will be an opportunity to catch more valuable fish. Experienced fishermen simply cannot catch low-level fish.
The higher the fishing level, the more difficult it is to catch fish. Valuable fish high level stronger and smarter than their low-level counterparts. We need to constantly improve our skill levels Pumping And Reeling, making them equal to skill Fishing Expertise.
More valuable fish differ in color from less valuable ones. Fish come in several colors: green, jade, blue, yellow, orange, purple, red, white and black. Green ones are the weakest fish, they have little health, but the reward for them is appropriate, while black ones are the toughest, and to catch them you will need a fishing rod of at least A class. The color of the fish caught depends on the level Fishing Expertise (Fishing Expert)- the higher it is, the better fish you will catch. You can only catch fish of your fishing level, one level less or one level more. In the table below you can see the level and color of the fish.
| Skill level Fishing Expertise |
Fish caught |
| 1 | Small Green Fish |
| 2 | Green Fish |
| 3 | Big Green Fish |
| 4 | Small Jade Fish |
| 5 | Jade Fish |
| 6 | Big Jade Fish |
| 7 | Small Blue Fish |
| 8 | Blue Fish |
| 9 | Big Blue Fish |
| 10 | Small Yellow Fish |
| 11 | Yellow Fish |
| 12 | Big Yellow Fish |
| 13 | Small Orange Fish |
| 14 | Orange Fish |
| 15 | Big Orange Fish |
| 16 | Small Purple Fish |
| 17 | Purple Fish |
| 18 | Big Purple Fish |
| 19 | Small Red Fish |
| 20 | Red Fish |
| 21 | Big Red Fish |
| 22 | Small White Fish |
| 23 | White Fish |
| 24 | Big White Fish |
| 25 | Small Black Fish |
| 26 | Black Fish |
| 27 | Big Black Fish |
Temporary reduction in fishing skill level
Sometimes it is necessary to catch fish of a certain type and level. To do this, there is an opportunity for an hour to become the level of fishing that is needed to successfully catch this particular fish. From the fisherman, in addition to bait and fishing rods, you can purchase special potions of the color you need ( Fisherman's Potion). After drinking a bottle of red fisherman's potion, you a whole hour you will catch red fish (you will be at this level of fishing).
The level of fishing can only be lowered. Therefore, it is useless to drink a potion of a higher level than your fishing level. There will simply be no effect.
You can drink another potion before the first one ends. You can cancel the effect of the potion and return your fishing level by drinking a black bottle recovery potion (Fishing Potion).
Using floats
Floats (Fishing Shot) doubles both successful and unsuccessful effects of using skills Pumping And Reeling. Floats can be obtained by quest "Fishing Shot" at the fisherman's. After the quest has been taken from many mobs, the list of which can be viewed there, you will receive Sweet Fluid, which can be exchanged with the fisherman for floats. Floats must be of the same grade as the fishing rod.
Night fishing
There are some features of night fishing. At night it is necessary to use special night baits ( Luminous Lure).
Night fish are much more cunning and try to deceive the fisherman. When the fish uses a deceptive maneuver, splashes appear around the float and the color of the strip changes. In this case, you need to use the skills exactly the opposite, that is, instead of Pumping use Reeling, instead of Reeling use Pumping.
Night baits are ineffective during the day.
Fishing is a very entertaining process. In order to start fishing, we will need to learn the initial skills for fishing, such as Fishing, Fishing Expertise, Pumping and Reeling. In addition to these skills, you will also need to purchase a fishing rod and bait. All these necessary things can be purchased from the NPC fisherman, and you can also learn the skills necessary for fishing from him. The fisherman is usually located in magic shops (where they sell CoE) or near seaports.
With these simple tools, you will be able to catch fish and treasure chests in the future. You can get resources by double clicking on a fish or chest. The materials you get from fishing can be used in Common Crafting, or exchanged for Proof of Catching a Fish. Proof of Catching a Fish is used to level up additional skills, this is especially important for gnomes. Fishing is not as long a process as you might think, and in order to get what you need, you don’t have to sit for days on a fishing rod; the fish are caught relatively quickly.
How to fish
To make the fishing process easier, it is advisable to put the fishing skills (Fishing, Pumping and Reeling) in the quick access panel; I also advise you to place your weapon, fishing rod and fishing shots in the same quick access panel.
The basic scheme for fishing:
- We find a place for fishing. You can fish anywhere where a breath line appears in the water. After you find such a body of water, you will need to go to the very edge of the water, but do not go into it.
- Let's take a fishing rod and bait in our hands.
- Using the Fishing skill we will cast a fishing rod, after which the fishing screen will appear. Then you will have to wait until the fish’s HP bar appears on the fishing screen, this will mean that the fish is almost hooked.
- It is necessary to use the Reeling skill when increasing the health of the fish.
- If the fish's HP level remains unchanged, it will be necessary to use the Pumping skill.
Depending on how timely you used the Reeling and Pumping skills, it will depend on whether you catch the fish or whether it breaks. Because if there are mistakes, the HP of the fish will be restored and it will break loose.
At successful catch or, on the contrary, not successful, you can return to point number 3 and return to it until you get tired of it.
At first glance, this process seems easy, but it is not. Although, as a result of your fishing efforts, you can catch a fish or a treasure chest, but, occasionally, you can pull out a mob of about your level. It is for this reason that I advised above to insert your weapon into the quick access panel.
And now about everything in detail...
Fishing skills
Fishing(active) - this skill is used to throw a fishing rod into the water. The maximum skill level is 1.
Fishing Expertise(passive) - this is the main fishing skill. It affects how strong and expensive fish you can catch. It is very important to have the required level of this skill, because if you overlearn it, you will receive a fishing penalty and it will become more difficult to catch fish. So, this skill must be learned gradually, looking for its optimal level, which will allow you to fish more effectively.
Level 1-26
Pumping(active) - this skill affects the amount of damage inflicted on the fish when using Pumping. It is recommended that the difference between the levels of the Pumping and Fishing Expertise skills does not exceed 2, otherwise you will receive fishing penalties.
Level 1-26
Reeling(active) - this skill affects the amount of damage inflicted on the fish when using Reeling. It is recommended that the difference between the Reeling and Fishing Expertise skill levels not exceed 2, otherwise you will receive fishing penalties.
Level 1-26
Cost of skills
Unlike ordinary skills, fishing skills are learned for adena.
Below is a table that shows the cost in adena for upgrading the Fishing Expertise, Pumping and Reeling skills. For example, in order to upgrade the Fishing Expertise skill from level 1 to level 2, you need 50a. And the third column indicates the total cost of learning the skill if you download it from level 0. For example, to increase the Pumping skill from level 0 to level 5, you need to spend a total of 1`060a.
|
The total cost of upgrading all skills for fishing is 3,785,200a
Things needed for fishing.
Fishing Rod- fishing rod.
Fishing rods are very similar to weapons, in that they, like weapons, have their own class, that is, you can use a fishing rod of your class or lower, and if you use a fishing rod of a class lower than yours, you will have penalties when fishing. When fishing, the damage you will inflict on the fish depends both on your fishing rod and on the level of your skills.
Fishing rod cost table
| Grade | Fishing rod | Price |
| None | Baby Duck Rod | 36,000 |
| D | Albatross Rod | 120,000 |
| C | Pelican Rod | 480,000 |
| B | Kingfisher Rod | 1,440,000 |
| A | Cygnus Pole | 4,800,000 |
| S | Pelican Rod | 12,000,000 |
Fishing Lures(bait)
Lures come in three colors and are divided into three classes, for fast fish, for ugly fish and for fatty fish. It is advisable to buy bait only of the High Grade class, since when using this class of bait you will be able to catch fish faster than when using weaker classes of bait, and you will also catch more valuable fish. Considering that the bait is quite cheap, it is better to buy a higher quality one.
With a High Grade bait, the chances of catching a fish of your level are approximately 60%, respectively, a 30% chance of catching a fish 1 level below yours and a 10% chance of catching a fish 1 level above yours.
| Bait | Adena | Effect |
| Green Colored Lure - For Beginners | 60 | |
| Green Colored Lure - Low Grade | 120 | prefers fast fish |
| Green Colored Lure - Medium Grade | 144 | prefers fast fish |
| Green Colored Lure - High Grade | 180 | prefers fast fish |
| Yellow Colored Lure - For Beginners | 72 | |
| Yellow Colored Lure - Low Grade | 144 | prefers ugly fish |
| Yellow Colored Lure - Medium Grade | 180 | prefers ugly fish |
| Yellow Colored Lure - High Grade | 216 | prefers ugly fish |
| Purple Colored Lure - For Beginners | 84 | |
| Purple Colored Lure - Low Grade | 180 | prefers fat fish |
| Purple Colored Lure - Medium Grade | 216 | prefers fat fish |
| Purple Colored Lure - High Grade | 240 | prefers fat fish |
Ncsoft, as usual, calculated for us our chances of catching a certain fish with this bait. As a result, the table shows that Purple Colored Lure is the best bait for fishing. But, if you need to catch a specific fish, to find the required material or recipe, you will have to use different colors of bait. It also shows the tests performed to check the relationships.
| Color | Ugly% | Nimble % | Fat% | Chest% | Test | Ugly | Nimble | Fat | Chest |
| Green | 26% | 44% | 27% | 4% | 100 | 26 | 44 | 27 | 4 |
| Yellow | 41 % | 9 % | 50 % | - % | 30 | 12 | 3 | 15 | - |
| Purple | 32% | 23% | 40% | 4% | 70 | 23 | 16 | 7 | 3 |
As mentioned above, you have a chance to catch a mob on a hook.
Fish and Chests
Fish and chests become more and more valuable as your fishing level increases; if it becomes harder for you to catch fish, or the fish becomes very strong for fishing, then it is advisable to change the color of the bait to any other. You also have a chance to hook a fish whose level is higher than your fishing level, that is, if you hook it, you can only catch it when using the Fishing Shots skill or when using a fishing rod higher high class than the one you use, don’t forget about it important point. There is still a rare chance to catch a Black fish with a Class C fishing rod and Fishing Shots. Every 3 levels of fish and every chest have 3 varieties: Small, Normal, Big. You will catch fish and chests one class lower than your class. This means that you need to have at least 12 free slots for your catch - 3 levels and 3 types of fish, plus 3 levels of chests.
| Level | ColorLevel | Color | |
| 1-3 | Green | 16-18 | Purple |
| 4-6 | Jade | 19-21 | Red |
| 7-9 | Blue | 22-24 | White |
| 10-12 | Yellow | 25-27 | Black |
| 13-15 | Orange | N/A | N/A |
Cutting up the catch
As soon as you feel that you have caught enough fish, and at any time when you want, by double-clicking on the fish you can open it in order to see what is in it. The fish can be empty (about 50% chance), or you can get materials, recipes for common craft, or fish entrails (bones, intestines, black caviar), which can be exchanged for Proof of Catching a Fish.
Fish entrails can also be used for crafting, so you don't have to exchange them for Proof of Catching a Fish.
What is it for?
With Proof of Catching a Fish you can learn additional skills. Usually the level of a possible skill is calculated in the following way: 1 skill level per 10 levels of your character plus 1. So, for example, the Expand Inventory skill (increases the number of slots in your character’s inventory) has 3 levels, at character level 20.
The Expand Trade skill (increases the number of slots for trade) can only be upgraded to level 3, at character levels 40, 55 and 65. Expand Dwarven Craft (increases the maximum number of recipes in the recipe book, very important for Dwarves) can only be learned by Dwarves.
In most cases, Expand Warehouse, Expand Dwarven Craft, and Expand Trade are the skills that are important to most players.
Advice from experienced fishermen: Don’t look at the float - it is for beauty, not for business.
Also a tip: Don’t look at the inscriptions that appear ABOVE the strip (such inscriptions appear either on small character levels or when you fish with the For Beginners bait. It says when the Fish is pulling and when it is Leading). We need to learn how to fish with stripes...
Let's look at the fish's life bar! Pumping should be used when the fish's life bar is stagnant, and Reeling should be used when the fish's life bar begins to increase.
With a little practice, you will learn to capture these moments.
That's all, happy fishing!
Translation of the article: NEFRIT
| Rating: 0.0 (0) | 2011-07-21 |
Accelerating character development
Character development from level 1 to 85
- For more successful character growth, the effectiveness of quests for levels 1-85 has been increased.
- You can reach level 85 by completing tutorial and bonding quests.
- The amount of experience gained for quests has been increased. For hunting monsters in hunting zones, the amount of experience has been reduced.
- To avoid misunderstandings when completing the main quests, before Rebirth (Liberation for characters of the Artea race), announcements (scrolls) for some quests are not displayed.
After Rebirth (Liberation for characters of the Artea race), the scrolls are displayed in the usual order. - Quests have been added for subclass and dual class to further character development.
Now you can increase your level by completing training quests for your subclass in the same way as the main ones. - You can purchase the necessary equipment for character development while completing quests to change your profession (Liberations for characters of the Artean race).
- The procedure for issuing the necessary equipment for character development has changed. Certificates and Coins that were previously used are no longer issued.
- These include the items Proof of Courage, Certificate of Justice, and Iron Gate Coins.
- Certificates and Coins that are already available can be used in the same way as before the update.
- Now quest rewards in the form of items are given in quests from level 85.
Character development from level 85 to 94 (“Ten Days of Adventure”)
- After completing Rebirth or the third Liberation, it is now possible to obtain Polina's Equipment Set.
- Polina's Equipment Set includes weapons, armor and accessories for a period of 30 days.
- For characters level 85 and above, the quest “Ten Days of Adventure” has been added.
- The quest can be completed daily; it is taken in Aden from NPC Bormetyu.
- The quest can be completed a maximum of 10 times, with an additional reward given on the 10th time.
- Improved quests “Song of the Bard” and “Hero’s Diary”.
- For greater clarity, the gameplay process in hunting zones corresponding to your level has been changed.
- Upon reaching level 85 / 88 / 90 / 93 / 97, the quest becomes available by clicking on the “Training” icon.
- Changed some hunting zones for characters level 85 and above.
- Improved old and added new daily quests in hunting zones for players level 85 and above.
Peculiarities Quest Level Description Improvement Survivor's Debt 85+ Changed rewards and improved gameplay, expanded the territories between the Bloody Swamp and Altar of Evil regions New Cure for Madness 88+ A Fairy-Citizen who escaped from Kimerian from the Ancient City of Arkan asked to destroy the monsters that appeared in the Fairy Colony and collect Fairy Blood and Satyr Blood New Dreaming of peace 90+ Nerupa from the Fairy Colony asked to destroy the monsters that appeared in the Kimerian Forest Improvement Reveal the secret 93+ The rewards have been changed and the gameplay has been improved, as well as the areas where you can complete quests in the “Island of Souls” region have been expanded. Improvement Elimination of a dangerous element 95+ Changed rewards and improved gameplay for quests in the Forbidden Gates area
Character development from level 95 to 99 (“Dimensional Exploration – Expedition (30 days)”)

- Added quest for characters levels 95–99 “Dimensional Exploration - Expedition (30 days).”
- You can travel to the Waiting Hall at the Rift between Worlds using Ruine.
- The quest is available from NPC Belor or NPC Sentry.
- Daily quests for the character development system can be completed a maximum of 30 times.
- It is possible to receive additional rewards for the quest “Exploring Dimensions - Imposing a Seal,” which can be completed in a group.
Character development from level 100 (100 day capture plan)

- To support the development of characters from level 100 and above, the Dimensional Rift hunting zone has been added.
- You can travel to the Dimensional Rift using Ruine.
- Players level 95 and above can enter the Dimensional Rift.
- Added 2 quests for this zone.
- The daily assassination quest "100 Day Capture Plan", designed to support character development, can be completed a maximum of 100 times.
- For the 100th time, you can get an additional reward for the quest “Marshal Among Dimensions.”
Mentoring System
- The list of enhancing skills used by the mentor when connecting to the game has been changed.
- In order for the player to receive all the main enhancing skills of Spellcasters, the “Harmony of the Mentor” skill has been added.
- The “Rune of the Mentor” skill, which gives a bonus to experience depending on the character’s development below level 85, has been removed.
- The list of enhancing skills that a mentor receives has been changed.
- Added the “Ultimate Temptation of the Mentor” skill.
- In connection with the addition of “Mentor Harmony,” the skills “Guardian Mentor,” “Mage Mentor,” and “Berserker Mentor” will be removed.
- Instead of a graduation reward, a Graduation Gift is now awarded.
- In the gift you will find a variety of items that will be useful to you after Rebirth (the third Liberation for characters of the Artean race).
- The Mentee's Certificate, if already available, can be used in the same way as before the update.
- The additional bonus “Apprentice Badge”, which was issued for the development of an Apprentice that belonged to the Academy, has been removed.
Commission Trading
- Fixed a bug due to which the commission trading system did not work.
Faction System

- A total of 5 types of Factions have been added. When completing quests in the Faction system, you can increase the friendship rank for each type of Faction.
- In the “Factions” section of the general menu, you can familiarize yourself with the types of Factions and check the status of Friendship.
- The level of Friendship is individual for each character.

- Quests have been removed in accordance with the added Faction systems. For custom quests, current quest contents and items associated with them have been removed by default.
Fraction Quest Required level Friendship with the Faction Description Clan Blackbird Number of Chaos Shards 99+ Lower rank: No During execution, the level of Friendship differs depending on the rank, as does the reward Liberation operation 99+ 2nd rank and higher The trust of the Blackbird Clan can be obtained starting from rank 2 and above Saving Private Ranger 99+ Lower rank: 2nd rank and above Quests completed on Hell Island can be picked up after completing the quest Liberation Operation from NPC Sforza Bits of Magic 99+ Lower rank: No
Average rank: 1st rank and above
High rank: 2nd rank and aboveGhost of Kephensis 99+ Rank 4 and above The trust of the Blackbird Clan can be obtained starting from rank 4 and above Getting rid of ghosts 99+ Lower rank: 4th rank and above Quests completed on Hell Island can be taken from NPC Sforza Preparing for the decisive battle 99+ Rank 6 and above Quests completed on Hell Island for characters with the trust of the Blackbird Clan of rank 6 and higher can be taken from NPC Leona Blackbird Vicious lust 99+ Rank 6 and above To achieve the trust of the Blackbird Clan of rank 6 and above, you need to complete the quest “Power” and fight in the decisive battle Guardians of the Tree of Life Lost Tribesman, New Fairy 100+ Lower rank: No
Average rank: 1st rank and aboveDuring completion, the friendship level differs depending on the rank, as well as the Reward Elvish botany 100+ 2nd rank and higher Quests completed in the Magic Valley can be taken from NPC Celestia Fighting the spread of darkness 100+ Lower rank: 2nd rank and above
Average rank: 4th rank and above
High Rank: Rank 5 and aboveQuests completed in the Magic Valley can be taken after completing the quest "Elven Botany" from NPC Irene Saving the Tree of Life 100+ Rank 6 and above Quests completed in the Magic Valley can be taken from NPC Irene Giant Slayers Extracting Radiant Dust 100+ Lower rank: No
Average rank: 1st rank and above
High Rank: Rank 3 and aboveDuring completion, the friendship level differs depending on the rank, as well as the Reward Captured Demons 100+ Lower rank: 1st rank and above
Average rank: 3rd rank and aboveQuests completed in the Cave of Giants can be taken from NPC Sforza Kamael Schism 100+ 2nd rank and higher Evolution of the Giant 100+ 2nd rank and higher Quests completed in the Cave of Giants can be taken from NPC Retbach Controlling the Evolution of Giants 100+ Lower rank: 2nd rank and above
Average Rank: Rank 5 and aboveQuests completed in the Cave of Giants can be taken after completing the quest “The Sundering of the Kamael” from NPC Krenat Rebuilt Giants 100+ Lower Rank: Rank 0 and above
Average rank: 1st rank and above
High Rank: Rank 3 and aboveDuring completion, the friendship level differs depending on the rank, as well as the Reward Treasure of the Giants 100+ Lower rank: 2nd rank and above
Average rank: 4th rank and aboveQuests completed in the Cave of Giants can be taken from NPC Krenat Crushing Blow by Giants 100+ Rank 6 and above Quests completed in the Cave of Giants can be taken from NPC Krenat Aliens from another dimension Earn Ether's trust 100+ Lower rank: No
Average rank: 1st rank and above
High rank: 2nd rank and aboveDuring completion, the friendship level differs depending on the rank, as does the Reward Lost Temple of Spirits 100+ 1st rank and above The trust of an Alien from Another Dimension can be obtained starting from rank 1 and above Incredible spectacle 100+ 2nd rank and higher The trust of an Alien from Another Dimension can be obtained starting from rank 2 and above Memory of the Wind 100+ 1st rank and above
2nd rank and higherQuests completed in the Temple of Spirits for characters who have the trust of an Alien from Another Dimension of rank 2 and higher can be taken from the NPC Master Giphon Energy of sadness and anger 100+ Rank 4 and above The trust of an Alien from Another Dimension can be obtained starting from rank 4 and above Saiha Energy 100+ Lower rank: 4th rank and above
Average Rank: Rank 5 and aboveQuests completed in the Temple of Spirits for characters who have the trust of an Alien from Another Dimension of rank 4 and higher can be taken from the NPC Magister Belas Hardening by test 100+ Rank 6 and above Kill the Queen of Spirits 100+ Rank 6 and above Quests completed in the Temple of Spirits for characters who have the trust of an Alien from Another Dimension of rank 6 and higher can be taken from the NPC Ether De Gan Imperial Guards Base renovation plan 101+ Lower rank: No
Average rank: 1st rank and above
High rank: 3rd rank and above
Highest rank: 6th rank and aboveDuring execution, the friendship level differs depending on the rank, as does the reward Before the Storm - The Importance of Supply 101+ 2nd rank and higher Quests completed in Astatine Fortress for characters who have the trust of an Imperial Guardsman of rank 2 or higher can be taken from NPC Elric Attack on Embryo supply lines 101+ Lower rank: 2nd rank and above
Average Rank: Rank 5 and above
High Rank: Rank 8 and aboveQuests completed in Astatine Fortress can be taken after completing the quest “Before the Storm - Hunt for Supplies” from NPC Richard Van Dyck Before the Storm - Rescue of the Blacksmiths 101+ Rank 3 and above Quests completed in Astatine Fortress can be taken after completing the quest “Before the Storm - Hunt for Supplies” for characters who have the trust of an Imperial Guard of rank 3 or higher from NPC Hurak Replenishment of strength 101+ Lower rank: 3rd rank and above
Average rank: 7th rank and above
High Rank: Rank 9 and aboveQuests completed in Astatine Fortress can be taken after completing the quest “Before the Storm - Rescue of the Blacksmiths” from NPC Dinford Before the Storm - Face to Face with the Enemy 101+ Rank 4 and above Quests completed in Astatine Fortress can be taken after completing the quest “Before the Storm - Saving the Blacksmiths” for characters who have the trust of an Imperial Guard of rank 4 or higher from NPC Hurak Opportune moment to capture the fortress 101+ Rank 10 and above Quests completed in Astatine Fortress for characters with the trust of an Imperial Guard of rank 10 or higher can be taken from NPC Richard Van Dyck
- NPCs from whom you can exchange modified quest items for a reward.
Corresponding NPC Corresponding quest Item name Exchange Items Dinford Base renovation plan Certificate of Honorary Member of the Avangard Middle Rank
Certificate of Honorary Member of the Vanguard High RankAden Vanguard Reward Chest Giphon Earn Ether's trust Mid-Rank Trust Mark
High Rank Trust MarkChest with Ether's Reward Krenat For true independence! Level 2 Resistance Sign
Level 3 Resistance Sign
Level 4 Resistance Sign
Level 5 Resistance SignChest with Shumadriba's Reward
- Exchange is possible until certain maintenance work (the timing of removal will be announced later).
- Bonuses that are acquired depending on the rank of Friendship with Factions.
Power Friendship Bonuses Clan Blackbird 2nd rank and higher Killing Windy Archer and Rotting Hannibal increases the likelihood of the Necromancer Megalith appearing, killing whom you can get points to increase the stage of necromancy Rank 4 and above Killing Humpback Beetle, Desert Wendigo, Kanzaros and Kandalos increases the likelihood of the appearance of a Royal Scorpion, killing which increases Thirst for all party members Guardians of the Tree of Life 2nd rank and higher Celestia's teleport can be used to travel East and West Rank 4 and above Giant Slayers 2nd rank and higher From the 1st zone at the Entrance to the Cave of Giants you can teleport to the 4th zone Rank 3 and above In the Kamael Stronghold you can use the Teleport Function Rank 4 and above Increased the chance of the key to the Giant's Treasure Room dropping out Rank 5 and above Can be teleported to the entrance to the Giant's Treasure Room Aliens from Another Dimension 2nd rank and higher Belas's teleport can be used to travel to the West and East Rank 4 and above Can use Yubin and Totoe's Teleport Function Imperial Guards Rank 3 and above You can use the Teleportation Device at the Base Rank 6 and above Each Stronghold can use a Teleportation Device
- Talismans have been added for each of the Factions.
NPC Item name Effect Sforza Talisman of the Blackbird Clan level 1-10 Reduced damage taken from demon race monsters
Strengthening P. Atk. on demons
Increase P. Atk.Celestia Talisman of the Guardian of the Tree of Life level 1-10 Reduced damage taken from plant monsters
Strengthening P. Atk. on plants
Increase M. Atk.Krenat Giant Slayer Talisman level 1-10 Reduced damage taken from giant monsters
Strengthening P. Atk. on the giants
Increased P. Damage. Crete. Atk.Giphon Alien Talisman from Another Dimension level 1-10 Reduced damage taken from spirit race monsters
Strengthening P. Atk. on Spirits
Increased Magic Damage. Crete. Atk.Dinford Imperial Guard Talisman level 1-10 Reduced damage taken from Embryo organization monsters
Strengthening P. Atk. on Embryo
Increase P. Def. / Mag. Def.


- Depending on the rank of Friendship with Factions, the following privileges are acquired.
- Added the item Skilled Fisherman's Fishing Rod.
- A new fishing rod can be made from the Head of the Fishermen's Guild of Santiago, the maximum level is 5th.
- To improve the qualities of a fishing rod, you need a Strong Fishing Rod and Santiago Reel Shards.
Fishing

- Added new types of Bait.
- When using the new Bait, more experience points and SP are given out than usual. Using Bait you can catch:
- New Fish can be exchanged for various rewards with a Member of the Fishermen's Guild.
- The following unused items are removed after changing the Fishing system.
Items to be deleted Small Mackerel Mackerel Large Mackerel Whale Beginner's Fishing Rod Small Mackerel Mackerel Large Mackerel Rusty Common Bait Fisherman's Fishing Rod Flounder Halibut Large Flounder Great Bait Professional Fishing Rod Small Gerbil Gerbil Large Gerbil Night Bait Hero's Fishing Rod Small Salmon Salmon Large Salmon Great Night Bait Fish bone Small Marlin Marlin Large Marlin Regular Float Fish scales Small Tuna Tuna Large Tuna Fish fat Small Medaka Medaka Large Medaka Fish Fin Minnow Minnow Large Minnow Fish Gem Small crucian carp crucian carp Large crucian carp Whale Oil Small Eel Acne Large Eel Small Catfish Som Large Catfish Small Carp Carp Large Carp
- In addition, fishing items can be exchanged with a Member of the Fishermen's Guild or sold in the Store.
- “Special PA Baits” have changed.
- The special PA Bait currently in use can be exchanged for a new bait from a Member of the Fishermen's Guild.
- “Treasure Map Piece” can be exchanged with Santiago for a “PA Treasure Box”.
- Starting quest items that can be obtained using special baits have been removed.
- To exchange, you need the items Stardust and Gem: Rank R, which can be obtained through fishing.
- Float weight changed from 3 to 1.
- You can now fish in the Aden Canal.
- Added items that can be exchanged with the Fishermen's Guild.
Necessary Exchange Items Fast Fish Warrior Cat Processing Stone - For Artey Boxing Glove Processing Stone - For Artey Warm Bear Paw Processing Stone Wedding Bouquet Processing Stone Cupid's Bow Processing Stone Candy Processing Stone Ugly Fish Scroll of Transformation into Clay Statue Transformation Scroll into a Beautiful Clay Statue Scroll of Transformation into Strong Clay Statue Scroll of Transformation into Old Clay Statue Scroll of Transformation - Pig Scroll of Polymorph - Rabbit Transformation Scroll: Ant Queen Scroll of Transformation into Orphen Scroll of Transformation to Anakim Scroll of Transformation into Lilith Agathion Constellation Bracelet - Level 1
Ugly FishAgathion Constellation Chest
- The menu for exchanging Fishing Guild Processing Stones and hats has been removed, and a menu for exchanging items for appearance has been added.
- In the tooltip for the item Skilled Fisherman's Fishing Rod, information has been added about the possibility of reducing fishing time.
- In the tooltip for any “Bait” items, information has been added about the ability to reduce fishing time.
- A deletion date has been added to the tooltip for fishing items that will no longer be used.
Clan
- Fixed a bug where the clan information window did not close automatically after editing the information.
- Fixed a bug due to which the clan tooltip was missing when hovering the mouse over the clan list.
Clan search system

- The “Share” function has been added to the Clan Joining System.
- Share: a method of joining a clan and joining the Academy through an Application without the permission of clan members with admission rights.
- Permission: The method of joining a clan and joining the Academy is through the Application and approval of a clan member with admission rights.
- By default, the “Permission” function is enabled in the Clan Search System.
- Fixed an issue where functions were incorrectly displayed when searching for a Melee Warrior and a Melee Mage in the Clan Search System Waiting List.
Academy
- You can upgrade the Academy's Circlet from the Academy Guide Arcadio.
- Improvement can only be made when joining the Academy at levels 80-85.
- The Academy Circlet can only be obtained once.
- Improved reward for the "Come to Me" quest.
- The clan reward is 500 Clan Reputation Points.
- You can get new paints.
Clan Halls

- Added the function of placing delegations, specialists and Faction decorations in places such as Castles, Fortresses, Clan Halls.
- With the help of a delegation, you can complete a daily quest and receive a reward for it in the form of a special item. This item and a certain amount of adena can be spent on placing a specialist and decorations.
- Specialists and decorations allow you to improve the effects of clan houses and create new items.
- Only the head and authorized members of the clan can distribute functions; the amount is distributed in the clan vault.
- Depending on the new distribution functions added, the functions of the monasteries have been changed.
- The Assist Magic menu has been removed.
- Only the 1st stage of item production is available for a period of 7 days.
- The list of goods and their prices for the production of stage 1 items have been changed.
- Some points for moving teleports of clan abodes have been added and removed.
- The recovery of HP, MP, experience has been changed, the price for using Decorations and equipment, as well as Teleport, has been increased.


